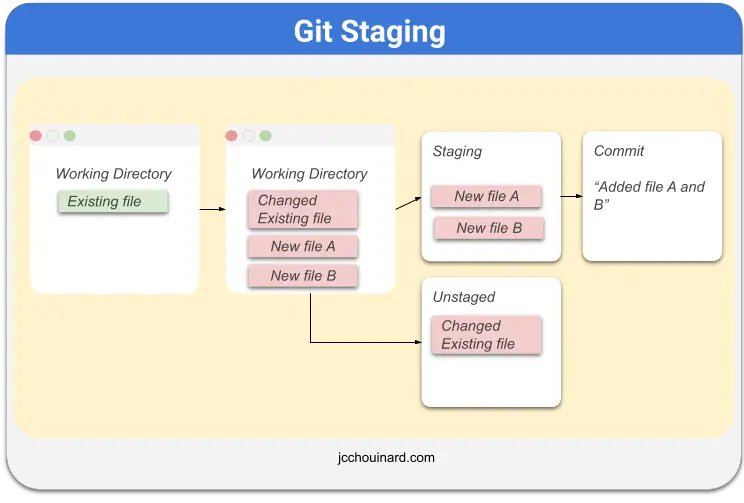
Staging in Git means to change the state of a modified file to an intermediate step called staged, ready to be committed.
Git has a staging area that stores file changes that have not been committed yet.
It is a step that allows you to continue making changes and record changes in small commits.
Getting Started with Staging
With staging, you can save a change to a file on your computer, but if it is not committed, git will not save a version of it.
Before you commit a file with git, you need to stage the change first.
Then, you can commit.
This way, you can stage multiple changes in a single commit.

Staging in Terminal Compared to Staging In VSCode
If you are using an IDE like VSCode when programming, you have the something like the source control panel that allow you to make Git integration easy.
In that panel, you can see your unstaged (or untracked) and staged changes.
If I were to do a commit now, only the staged changes would be committed.

Let’s see how to stage your changes.
Git Init: Initialize a Git Repository
Let’s start with an empty project and see how git staging works.

You can initialize a git repository by using the git init command.
$ git init
This will initialize a hidden git repository (folder named .git at the root of your project).

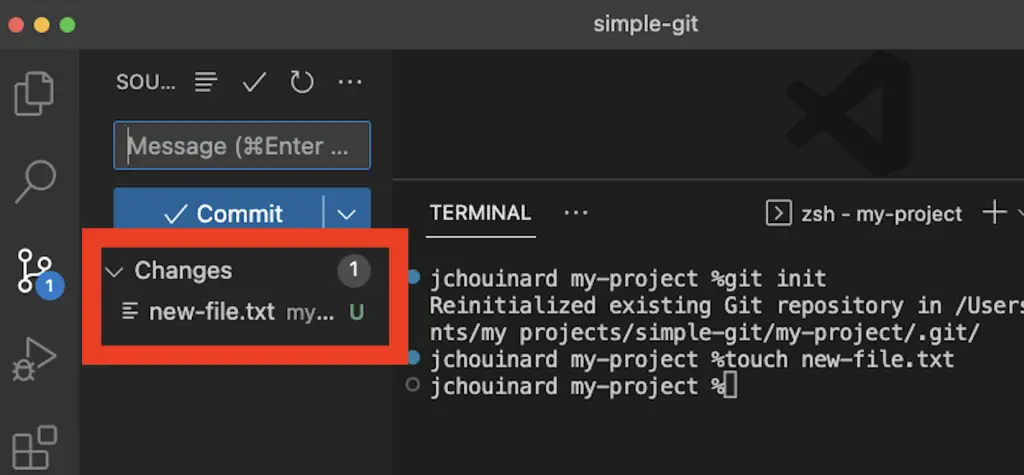
Nothing has changed in the project so far so you will create a new file:
$ touch new-file.txt

Git add: Adding a File to Staging with Git Add
The git add command allows you to stage files to be committed.
If you are using VSCode, you can view in the source control panel that a change was made, but that nothing was staged.

You could stage the change using the + sign in the source control panel. But in this case, I will show you the git add command in the terminal.

Use the git add command to stage the file in Git. In the Terminal type:
$ git add new-file.txt
And now you can see that it has been staged.

Git Status: Showing Staged Files
The git status command shows the files that are in the staging area.
$ git status
Here we can see the staged changes.

If there are no staged files and / or no changed files, the output will be similar but different.
Let’s create a new file and not stage it.
$ touch new-file2.txt
$ git status

The untracked files are the “unstaged” files.
If there were no new changes and no staged changes, the output will be more concise.
$ git status

On branch master

No commits yet

nothing to commit (create/copy files and use "git add" to track)
Git Diff: See What has Changed to the File
Use the git diff command to see what has changed.
Git diff will compare the existing file to the last saved version.
A diff is a formatted display showing the differences between groups of files.
You can use git diff without anything after. This will show you all changes in the repository.
$ git diff
You can also use git diff along with the directory name. This will show you all changes made in the directory.
$ git diff changed-file.txt
Or use git diff along with the filename. This will show you all changes made to the file.
$ git diff changed-file.txt
Git Commit: Committing Staged Files
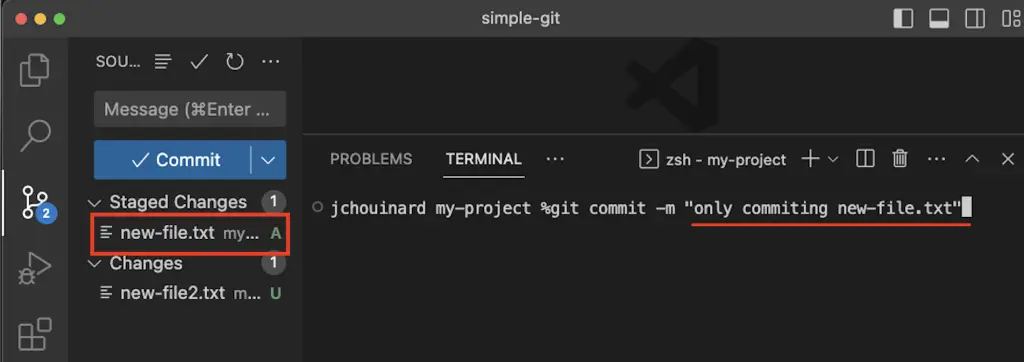
Now, If I want to commit, only the staged file(s) will be committed. In this case, only new-file.txt will be committed.
$ git commit -m "only committing new-file.txt"


Other Version Control with Git and Github Posts
Learn Git and Github (Complete Guide)
Basics of Version Control
How to Use Git and Github with VSCode

SEO Strategist at Tripadvisor, ex- Seek (Melbourne, Australia). Specialized in technical SEO. Writer in Python, Information Retrieval, SEO and machine learning. Guest author at SearchEngineJournal, SearchEngineLand and OnCrawl.