
In this tutorial, we will learn how to easily create or delete branches from a Git Repository on Github.

What Are Branches?
Branches are virtual environments that you can make changes within a container that does not impact the other branches.
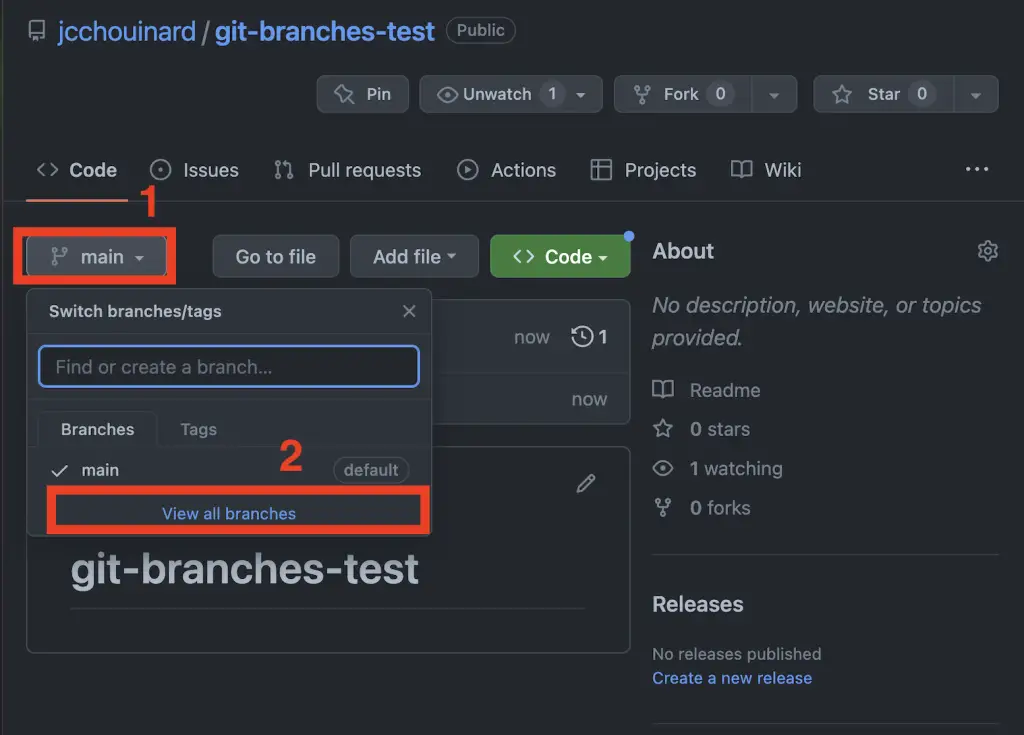
View All Branches on Github
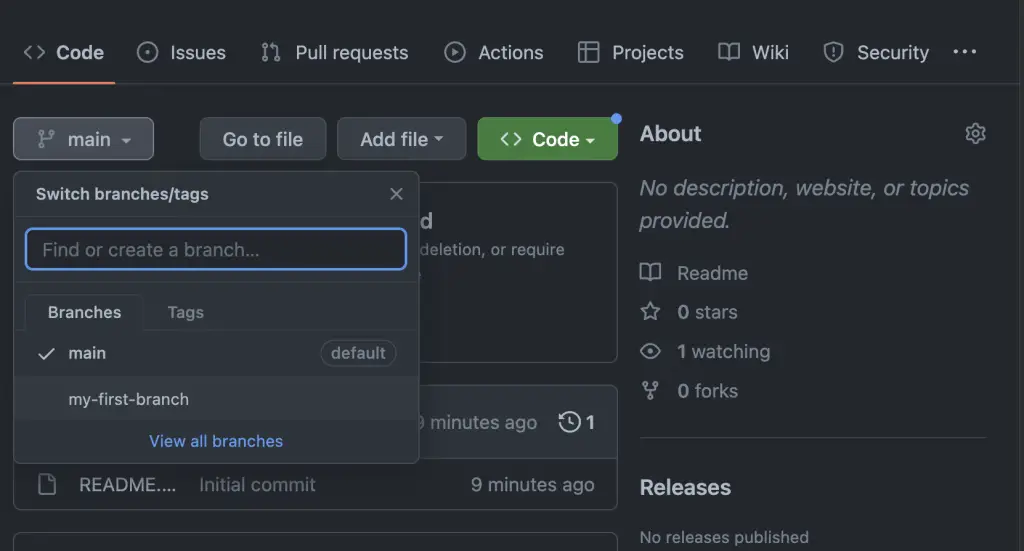
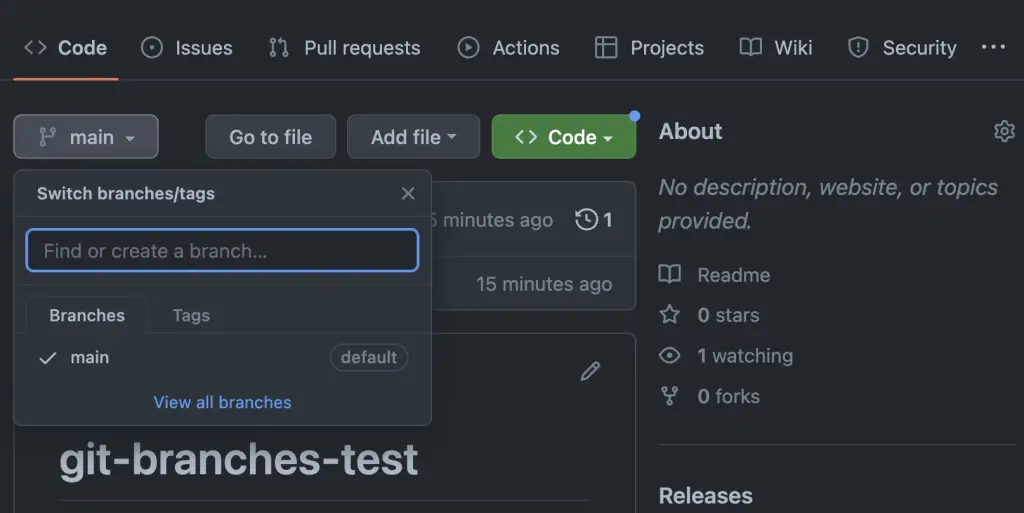
To view the branches in a Github repository, click on the “Code” tab from inside the repository and then click on the branch dropdown at the top left.
Then, click on “View all branches”.
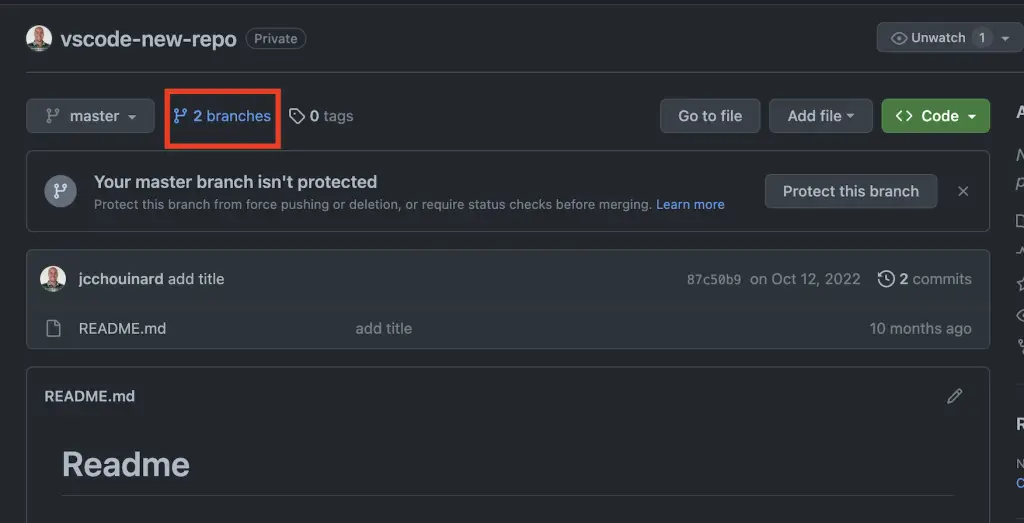
If you already have multiple branches, you can simply click on the branches button.
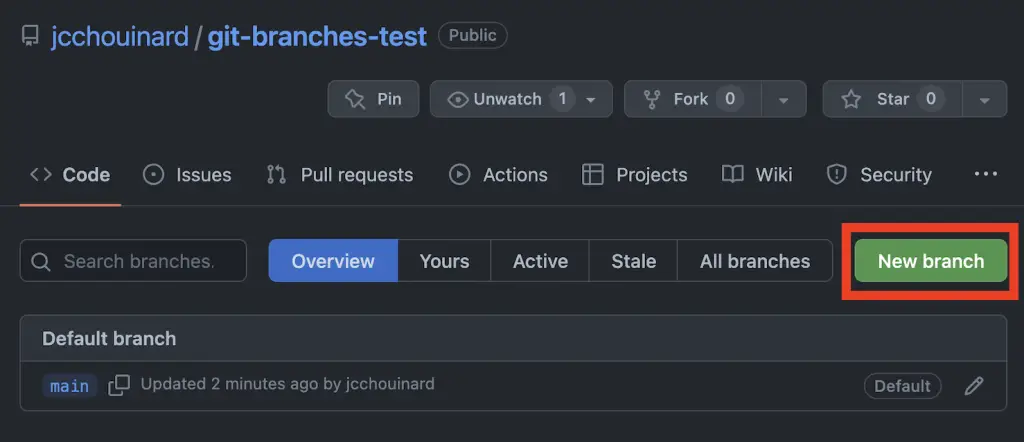
Create a New Branch on Github
To create a new branch from Github, go to your branches window (Repository > Code > Main > View All branches).
From that window, click on “New branch”.
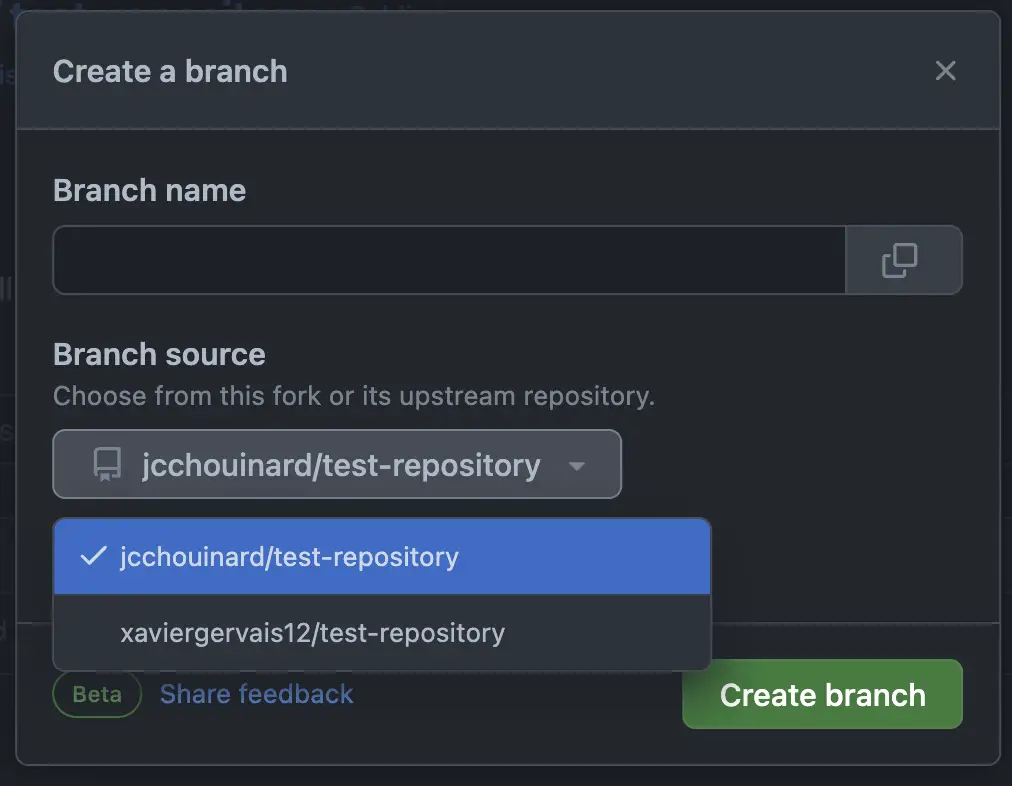
Name the branch and select the Branch source.
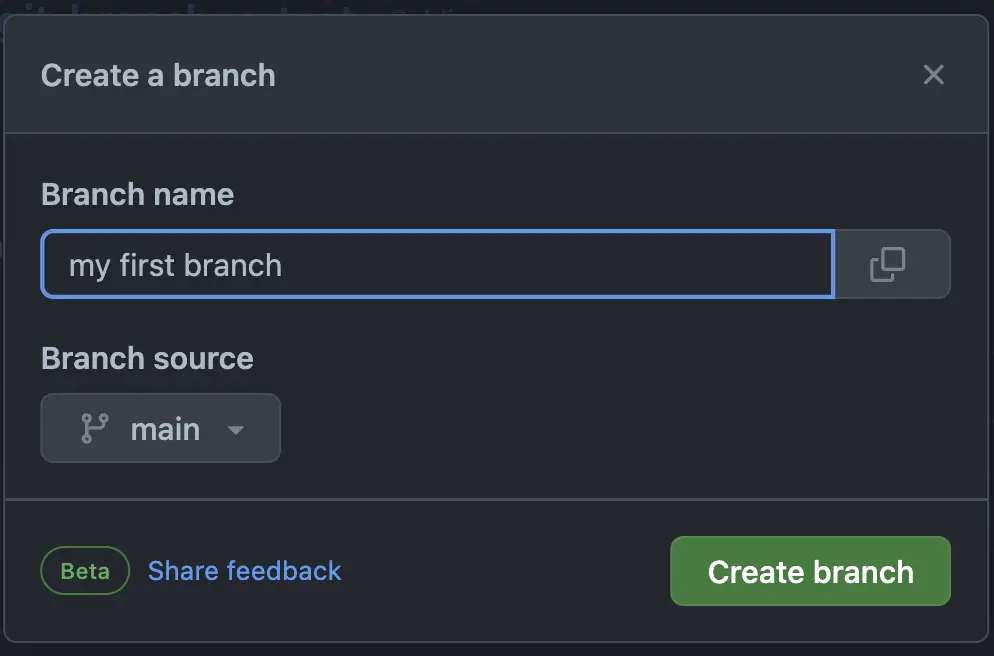
If your repository is a Fork, select your fork or the original repository as the branch source.
Next, a comment saying “Branch <branch-name> will be created shortly
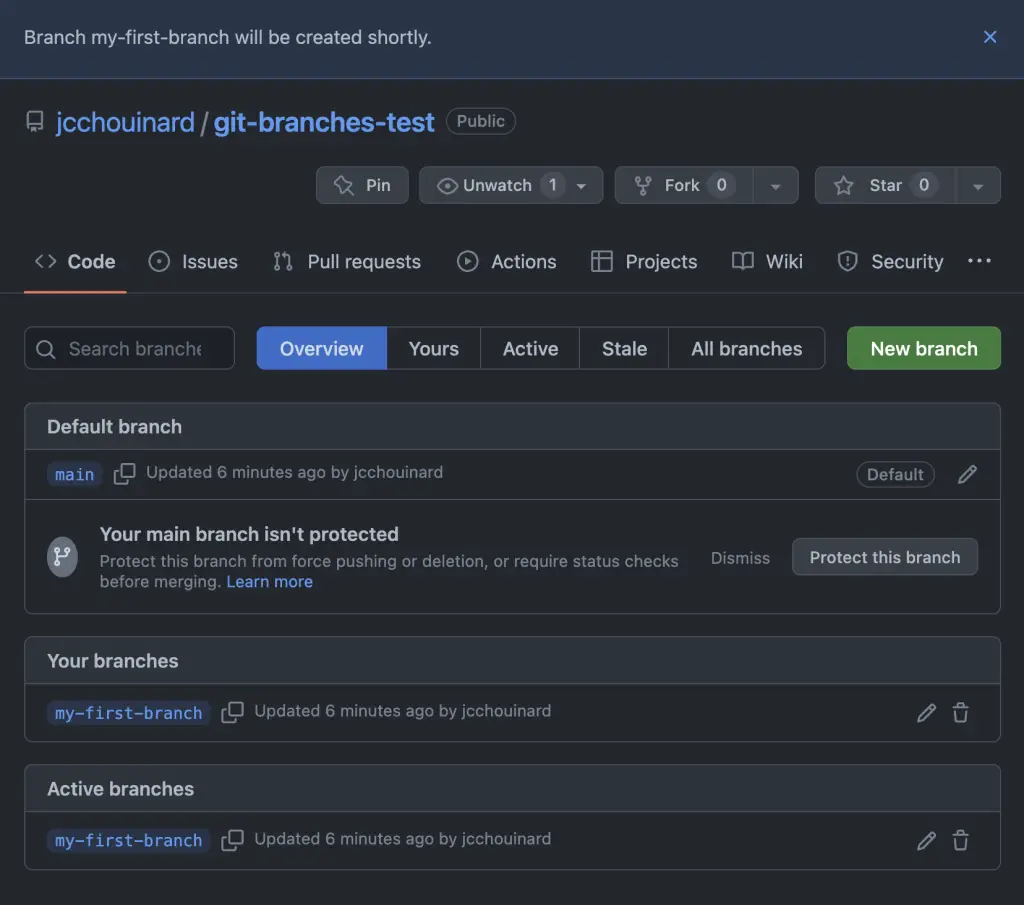
Below you see a comment saying “Your main branch isn’t protected”, that simply is a reminder to protect your default branches.
Going back to your code tab, you can see that the new branch was created.
Delete a Branch from Github
To remove or delete a branch from Github, go to the code tab and select your branch to delete it. Here are the detailed steps to delete a specific branch from Github.
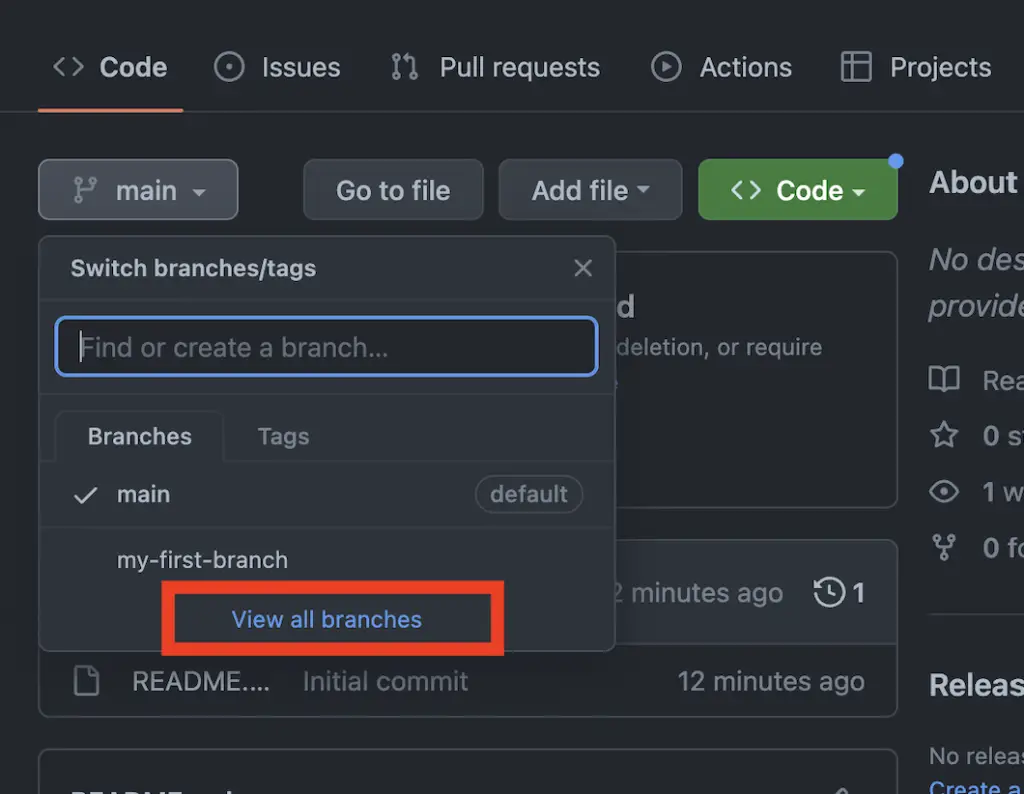
Go to the main page of your repository (“Code” tab). From the branches dropdown, click on the “View all branches” button.
From there, click on the garbage can next to the branch that you want to delete.
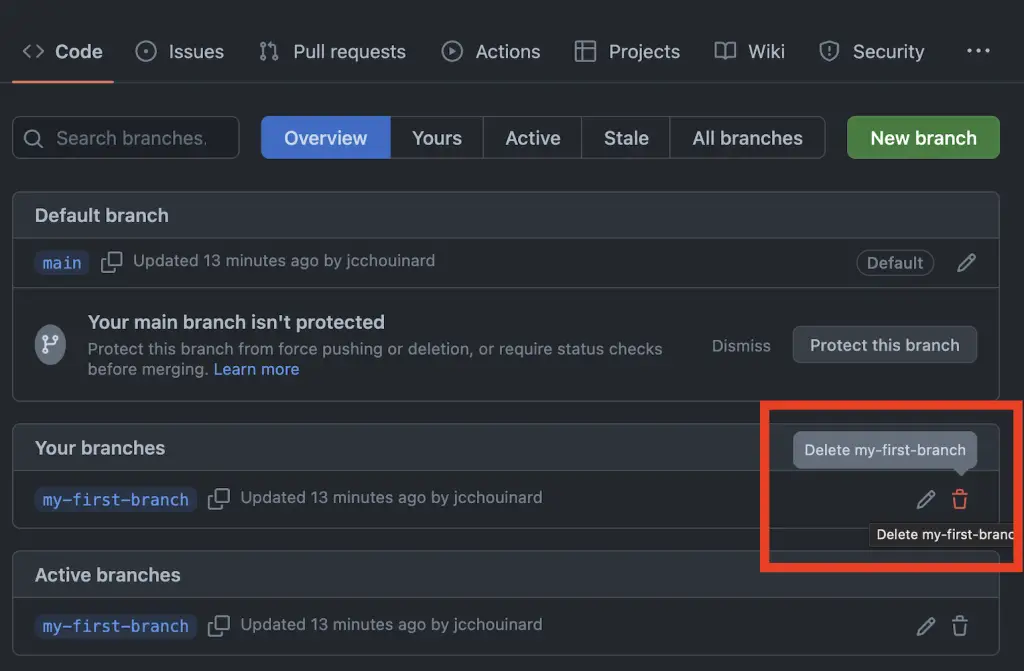
Come back to the main tab of your repository and check if the branch is still showing in the dropdown.
Restore a Deleted Branch on Github

To restore a deleted branch on Github, navigate the branches dropdown in the Code tab of your repository and click on “View all branches”.
Then, you can just as easily click on the “Restore” button next to your branch.

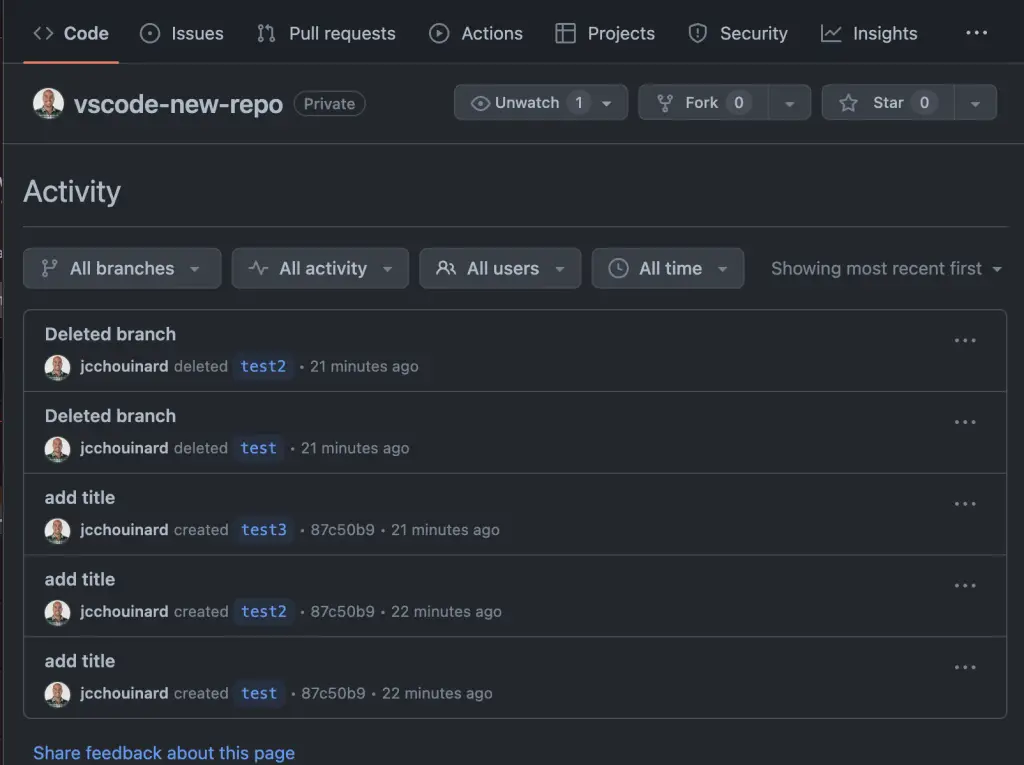
You can also get back and restore deleted branches from Github, in the activity panel shown in this next step.
View Deleted Branches in Github
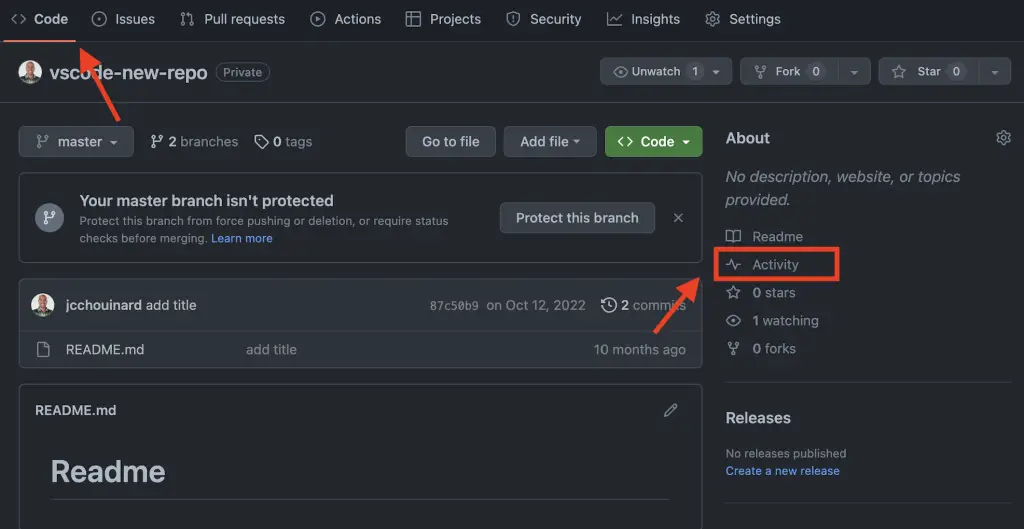
To view and see deleted branches in Github, go to Code and Click on “Activity” on the right hand panel
Inside the activity window, you will find all your deleted branches
Other Version Control with Git and Github Posts
Learn Git and Github (Complete Guide)
Basics of Version Control
How to Use Git and Github with VSCode
Conclusion
This is it, we now have learned how to create and delete branches on Github.

SEO Strategist at Tripadvisor, ex- Seek (Melbourne, Australia). Specialized in technical SEO. Writer in Python, Information Retrieval, SEO and machine learning. Guest author at SearchEngineJournal, SearchEngineLand and OnCrawl.