Visual Studio Code (VSCode) is a code editor that helps you to develop, run and debug code with built-in syntax highlighting, code completion and commit features.
In this post, I will show how you create, clone and work with your Github repository in VSCode.
Getting Started with Visual Studio Code and Github
Before we can push code to Github from Visual Studio Code, we need to make sure that we have done the following steps:
- Install VS Code.
- Create a Github Account
- Install Git
- Set-up Git and Github in VSCode
- Create a Github Repository From Github
- Clone the Github Repository From VS Code
Once these steps are done, we end up with a local version of the remote Github Repository. We can start learning how to commit and push code to Github from VS Code.
Commit and Push Code to Github from VS Code
To commit and push code to Github from Visual Studio Code, open the project inside VS Code, make any modification to file or folders, stage the changes and finally commit and push the changes from the source control panel. Here are the detailed steps:
- Open the Project in VS Code
- Create Gitignore File (optional but recommended)
- Save Changes to Your Files
- Stage the Changes in Source Control Panel
- Make your first commit in VS Code
- Push the Commit to Github from VS Code
1. Open the Project in VS Code
If you have not opened the newly created project in VSCode when you were ask if you wanted to open the repository earlier, now it is time to do it.
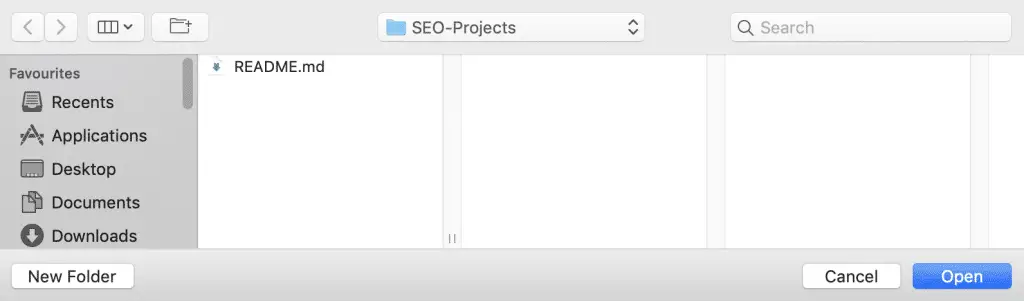
Click on File > Open, go to the cloned repository and click on “Open”.
2. Create Gitignore File
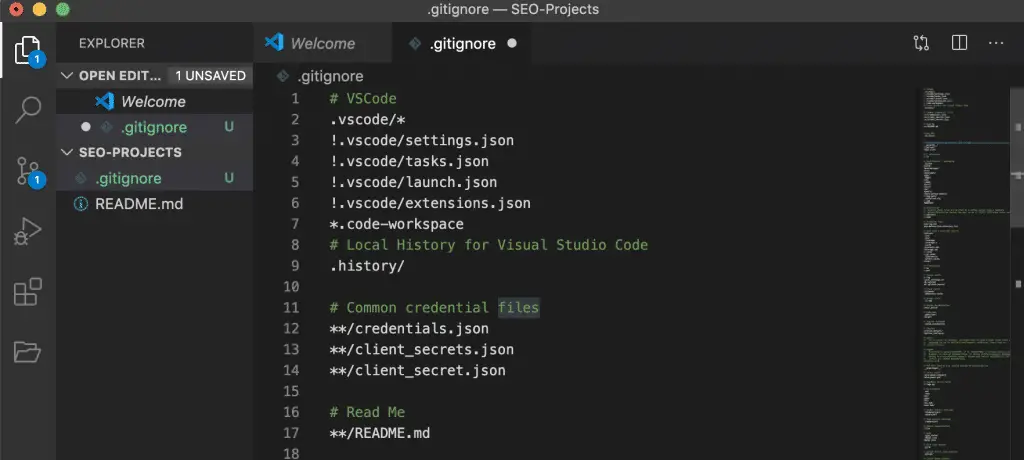
Next, it is recommended to create a .gitignore file before you commit anything to Github. When you commit and push something to Github, you might want to exclude some things from your commit: credentials (for security purposes), or other things like VS Code workspaces (for best practices). Here, you can use our gitignore template or learn how to create a gitignore file in VS Code.
3. Save Changes to Your File
The first step after making any changes is to save your file. Press CTRL+S (on Windows), or Command+S (on Mac), or go to File > Save.
This action will bring your file in the source control panel in VS Code.
4. Stage Changes in Source Control Panel
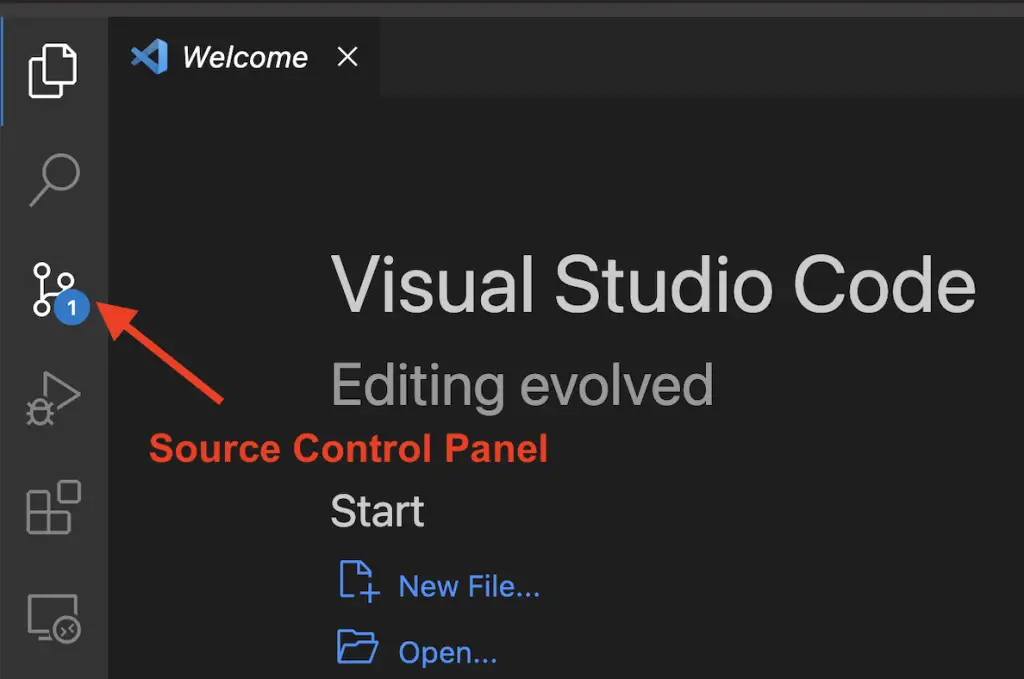
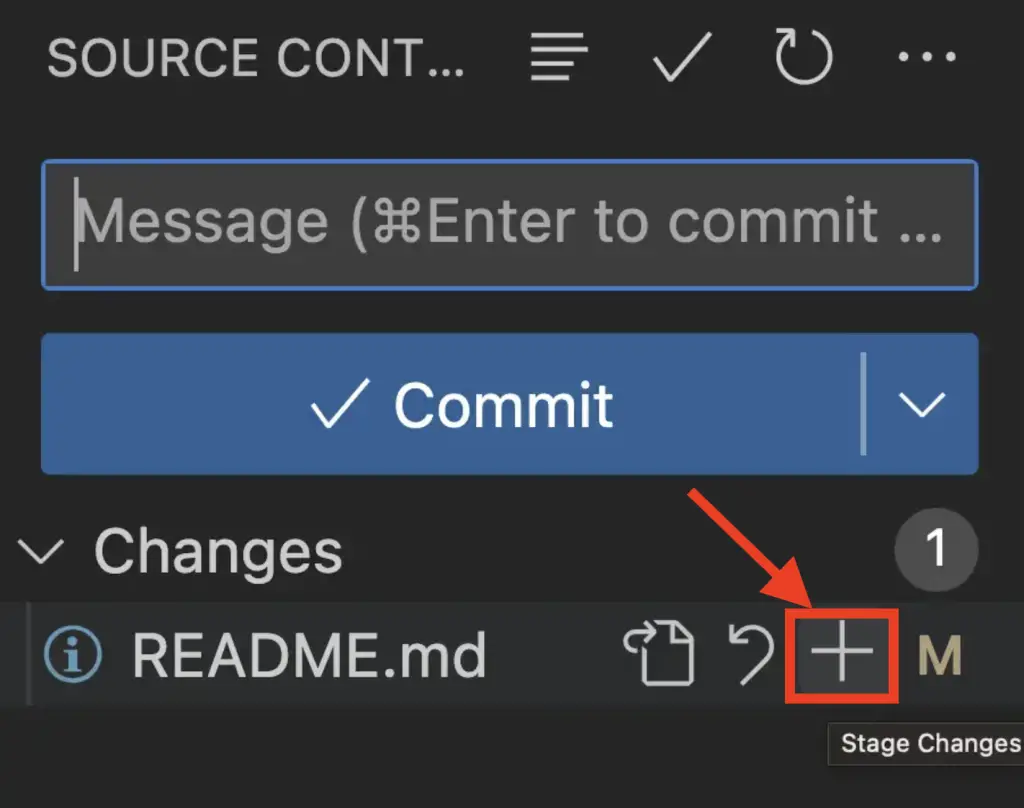
Before you can commit your changes to Git, you need to stage your changes in VS Code. To do so, go to the source control panel in VS Code.
And click on the + sign next to the file(s) that you want to stage for commit. (This is the equivalent of git add in Terminal).
5. Commit Changes in VS Code
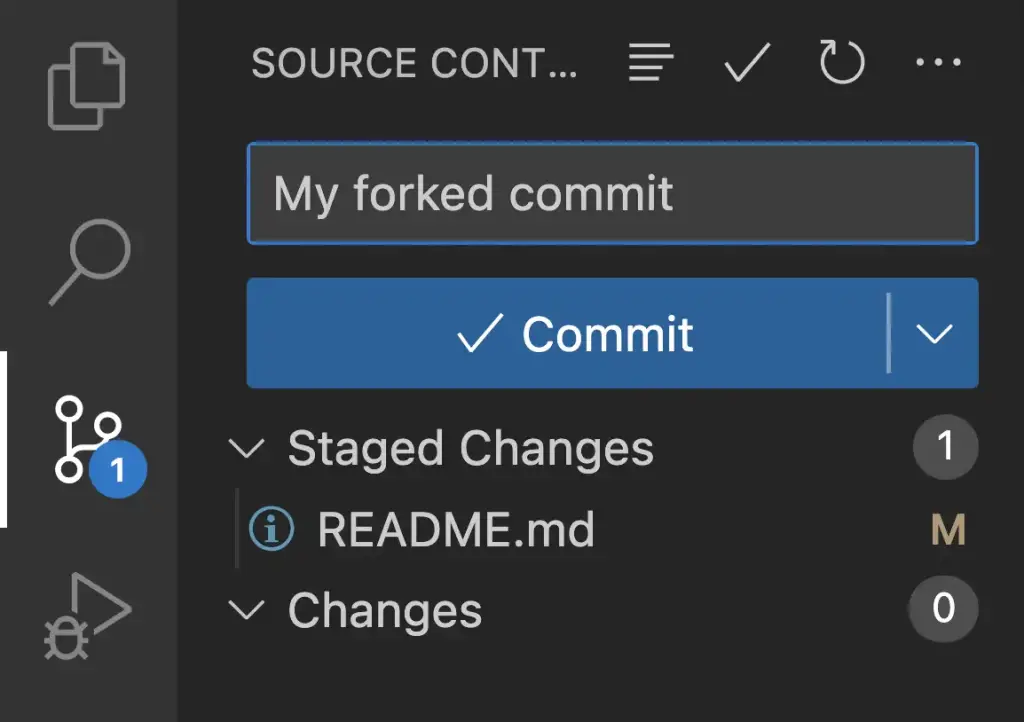
To commit your changes inside Visual Studio Code, go to the source control panel, add a commit comment above the staged changes, and click on the Commit button.
This will commit the changes you made to your master file. Add a message to help you understand what the commit is about.
4. Push the Commit to Github
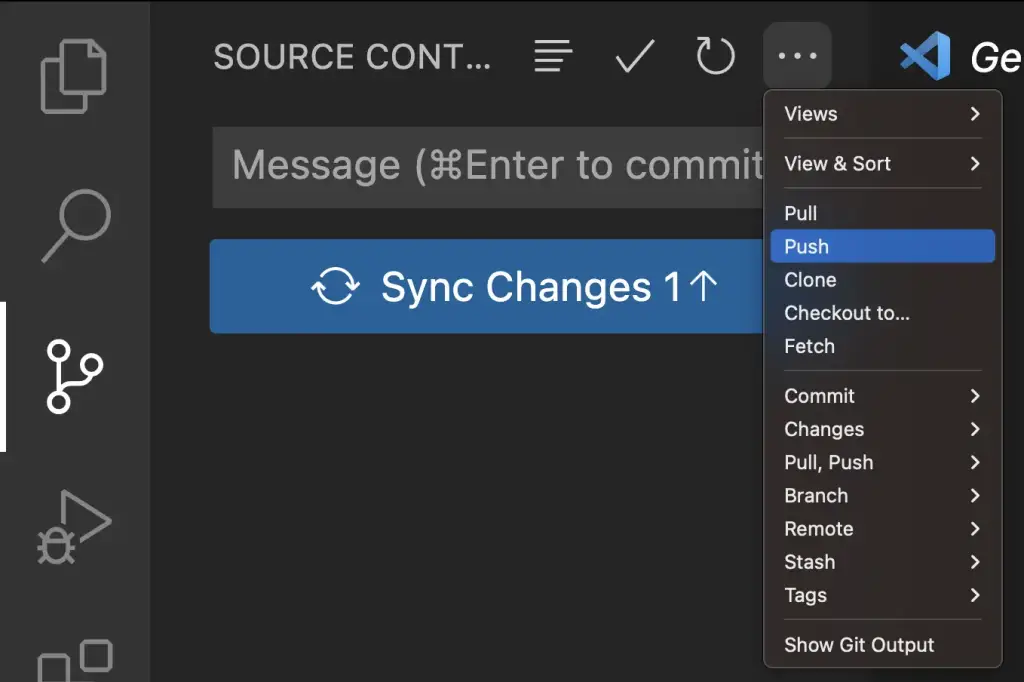
The last step is to push the commit to Github. Just click on the three dots ... and click on “Push”.
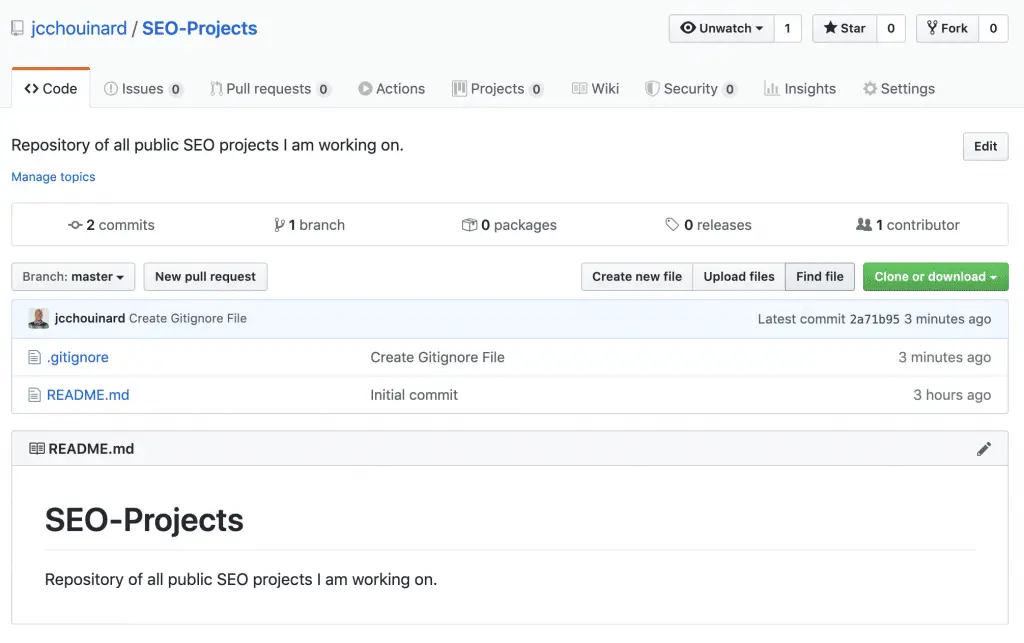
When all is done, go back to your Github repository and see that your .gitignore file has been pushed to Github and has the last commit message you added right next to it.
How to Push Code to Github from VSCode
To push code from Visual Studio Code to GitHub, open the Terminal in VS Code and execute the git push origin master command. Replace origin by the name of the remote repository and master by the name of the branch to be pushed. You may need to authenticate with your GitHub account if you haven’t already.
To push code from Visual Studio Code to GitHub using the source control, initialize a Git repository in your local project folder. Click on the Source Control icon on the left of the VS Code interface. Enter a commit message and click the check mark to commit your changes. Click on the ellipsis menu and choose “Push” to push your changes to your remote GitHub repository. That’s it! Your changes should now be visible in your GitHub repository.
Become a Git Master
Although very powerful, Git is very complex. I highly recommend that you follow Datacamp’s Git course to really become comfortable with Git commands and avoid painful mistakes.
Github VSCode Cheatsheet
Below are examples you can use in VSCode from VSCode commands, from Terminal, or from source control panel
- Access in VSCode commands:
Ctrl + Shift + PorCommand + Shift + P - Access Terminal in VSCode: From VSCode menu go to
Terminal > New Terminal. - Access source control panel: Select from lefthand bar or use
Control + Shift + G
| Create Github Repository in VSCode | Use “Publish to Github” command |
| Clone Github Repository in VSCode | Use “Git: Clone” command |
| Clone Github Repository from Terminal | Use git clone <repo-url> |
| Push Git Repository from Terminal | Use git push <remote> <branch> |
| Push Git Repository from Source Control | Stage, Commit, Select “Push” from Push, Pull menu |
Conclusion
Congratulations, you have created your first project with Github and VSCode. You are now ready to start coding.
Other Version Control with Git and Github Posts
Learn Git and Github (Complete Guide)

SEO Strategist at Tripadvisor, ex- Seek (Melbourne, Australia). Specialized in technical SEO. Writer in Python, Information Retrieval, SEO and machine learning. Guest author at SearchEngineJournal, SearchEngineLand and OnCrawl.