Welcome to this simple tutorial on how to use Playwright and Node.js for web scraping.
In this tutorial, we are going to focus on how Playwright can be used for:
- scraping websites,
- taking screenshots,
- and scraping websites that require login.
But if you are not familiar with scraping normal websites then read this simple introduction on web scraping with Nodejs.
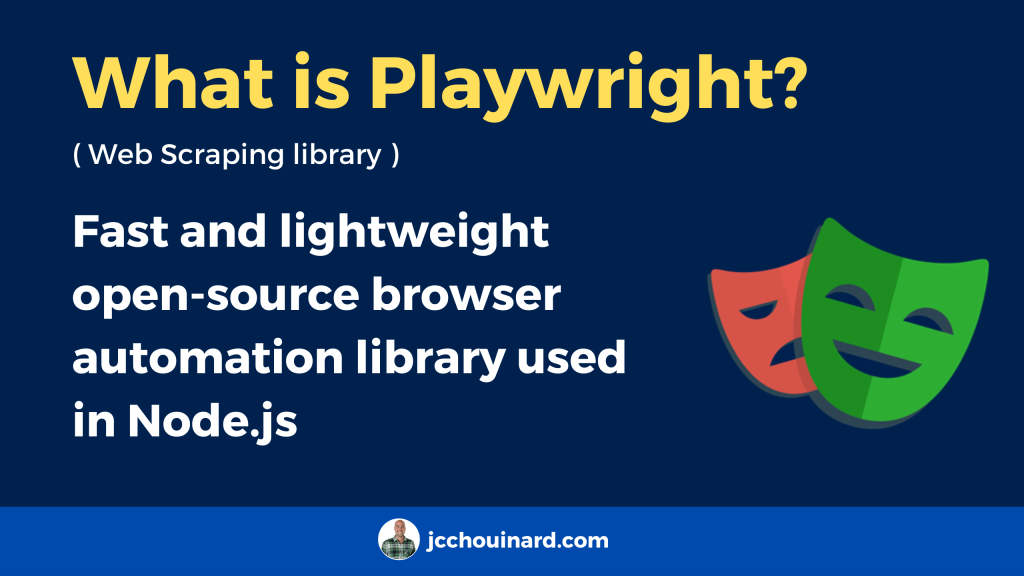
What is Playwright?
Playwright is an open-source browser automation Node.js library. It is fast and lightweight and requires very few lines of code to implement any web scraping task. It provides support for almost all popular browsers like Firefox and Chromium.
Before we begin with the coding part let’s first understand what is a headless browser because you are going to hear this term a lot of times throughout this tutorial.
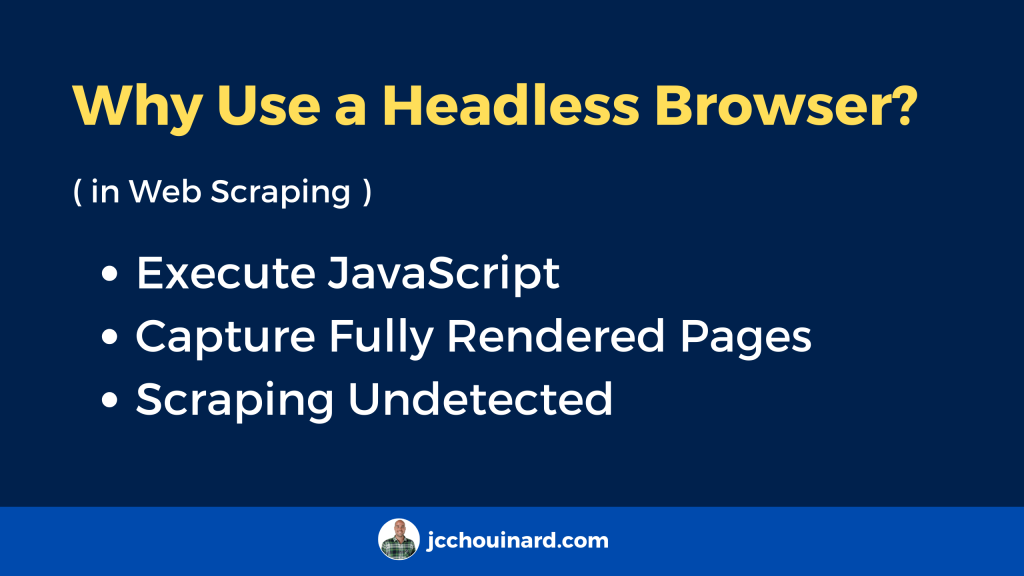
What is a Headless Browser?
A headless browser is a web browser without a graphical user interface (GUI). Simply put, it is an invisible browser that runs in the background without you seeing it (headless mode).
Why use Headless Browsers in Web Scraping?
You should use Headless browsers when you need to execute JavaScript and analyze a fully rendered pages during web scraping.
Headless browser allow a web scraper to render and process pages just like a regular browser. If a website heavily relies on JavaScript to load content, a headless browser ensures that you capture the fully rendered page. It also emulate human-like behaviour, which makes it harder for websites to distinguish between scraping bots and genuine users.
Web Scraping with Playwright
Let’s create a small scraper using Playwright and understand how it works.
How to Scrape a Website with Playwright and Node.js
To scrape a website with Playwright and Node.js, follow these steps:
- Install Node.js and NPM
- Initialize NPM
- Install Playwright and Cheerio
- Install Browsers
- Create Node.js Script
- Run Node.js Playwright’s Script
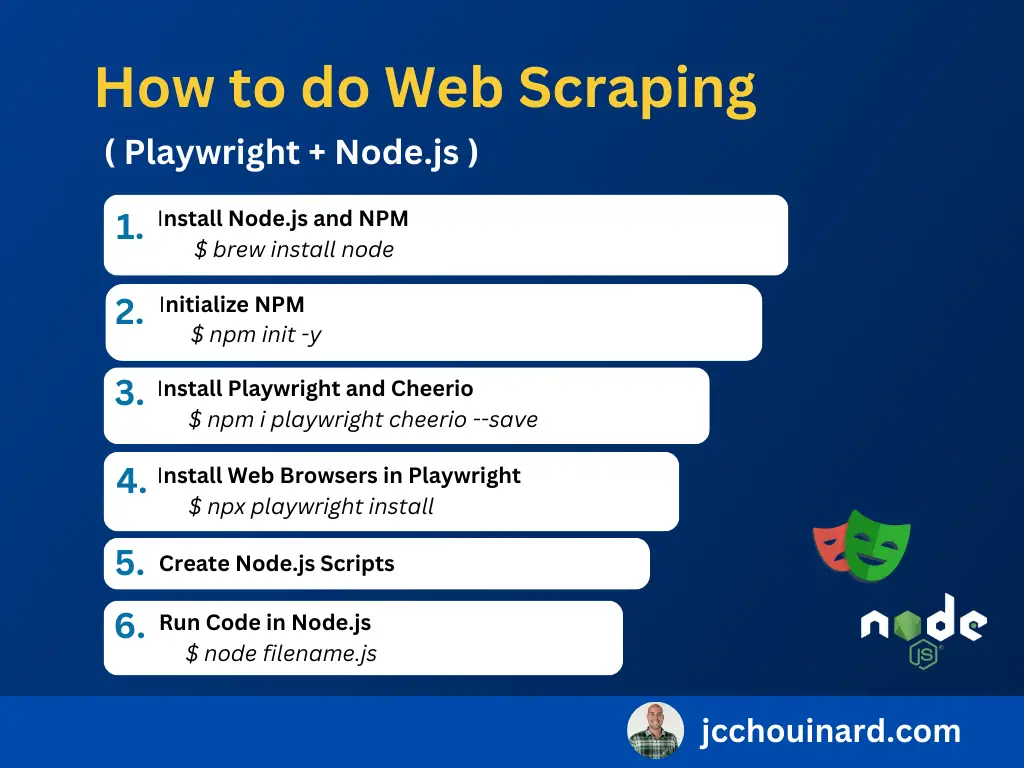
1. Install Node.js and NPM
The first step is to install Node.js and Npm on your machine. NPM will allow you to install packages and Node to run JavaScript.
2. Initialize NPM
But before we start coding let’s set up the coding environment. First, open the Terminal. Next, create a folder in which you are going to keep the playwright nodejs script. Finally, use the npm init -y command to initialize NPM. The -y flag is used to skip to initialization questionnaire.
$ mkdir play
$ cd play
$ npm init -y
3. Install Playwright and Cheerio
Now, let’s install Playwright and Cheerio. Playwright will be used for browser automation, while Cheerio will be used to parse the HTML (similar to what BeautifulSoup does in Python).
$ npm i playwright cheerio --saveAlong with Playwright, I have also installed Cheerio. Cheerio is a data parsing nodejs library. This will be used when we extract the price and other details from the raw HTML data of the target page.
4. Install Browsers
The first time that you install playwright, browsers may not all be up-to-date. Use the following command to download new browsers.
$ npx playwright install 5. Create Node.js Script
Now, we will create the Node.js script that will be used to scrape a website. The first script that we’ll run is the right.js file that will simply open and close a web page in a browser. Then, we will create additional scripts to:
- Scrape HTML tags
- Take Screenshots
- Authenticate within a website
You can create a file from the Terminal using the touch filename.js command or simply manually create one from your favourite code editor.
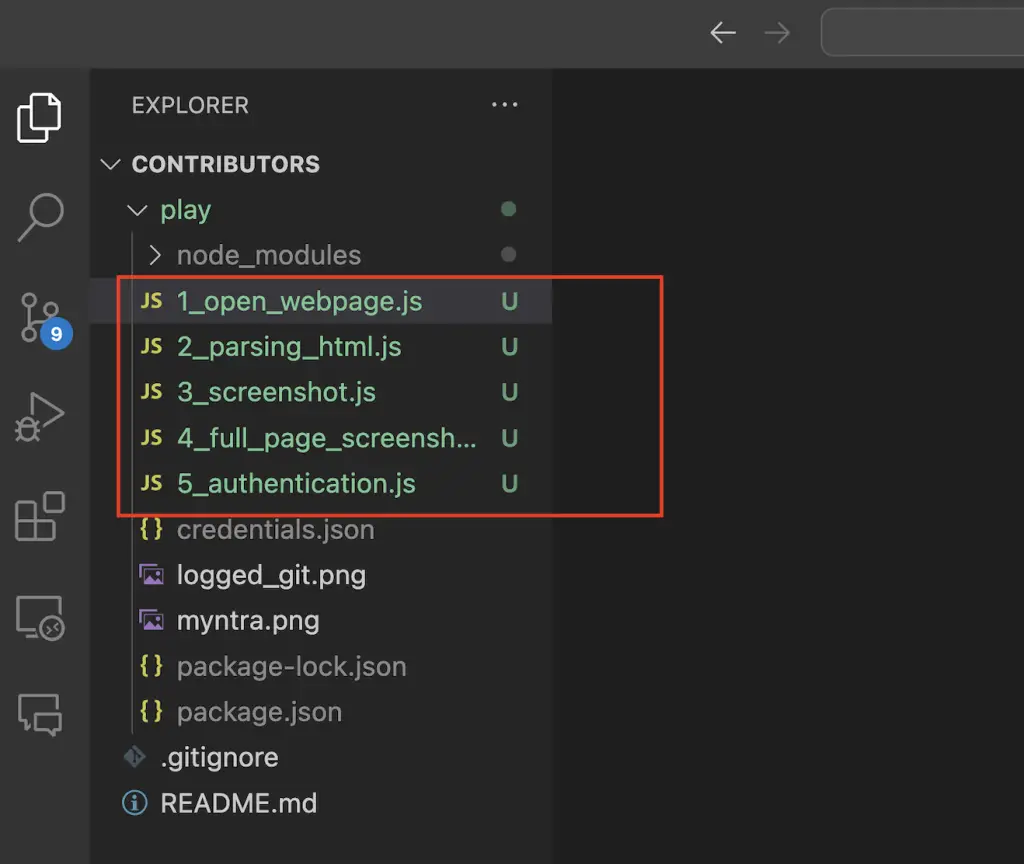
I have created a js file inside the play folder. You can name it anything you like. I have named it as 1_open_webpage.js.
Example How to Open a Web Page with Playwright in NodeJS
To open a web page with Playwright in Node JS, use the chromium.launch command to open the browser, then use NewPage() to open a tab and finally the goto command to open the page. Let us first write the basic code through which we can open the target page and close it.
// right.js
const playwright = require('playwright');
const cheerio = require('cheerio')
async function test(){
const browser = await playwright.chromium.launch({headless: false});
const page = await browser.newPage();
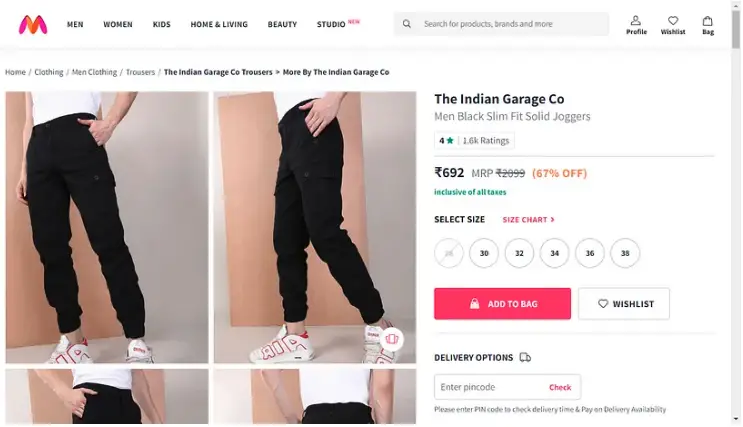
await page.goto('https://www.myntra.com/trousers/the+indian+garage+co/the-indian-garage-co-men-black-slim-fit-solid-joggers/9922235/buy');
await browser.close();
}
test()
Let me explain the code step by step.
- First, we import the Playwright library.
- Then inside the test() function, the first line uses Playwright to launch a Chromium browser. The headless: false option means that the browser will have a graphical user interface (GUI), and you’ll be able to see the browser window. If you set headless as true, the browser would run in the background without a visible window.
- Next line open a new tab in the browser.
- Then using goto() function playwright commands the browser to open the target page.
- Then using close() function we are going to close the browser window. This will also free up your resources.
The basic setup is ready. But before we dive in let’s first examine the page and check which information we are going to scrape and where it is located inside the DOM.
6. Run Node.js Playwright’s Script
Once your script is created, run Node.js code by using the node filename.js command in the Terminal.
$ node right.jsWeb Scraping Project with Playwright and NodeJS
In the following project, we are going to create Node.js scripts to:
- Scrape HTML Tags (Product Names and Prices)
- Take Screenshots
- Take Full Page Screenshots
- Authenticate Within a website
1. How to Scrape HTML Tags (Product Names and Prices)
To scrape HTML tags with Playwright, we need to fetch the page with Playwright and then use the Cheerio library to parse the HTML.
In this example, we are going to scrape the price and description of a product from an e-commerce website.
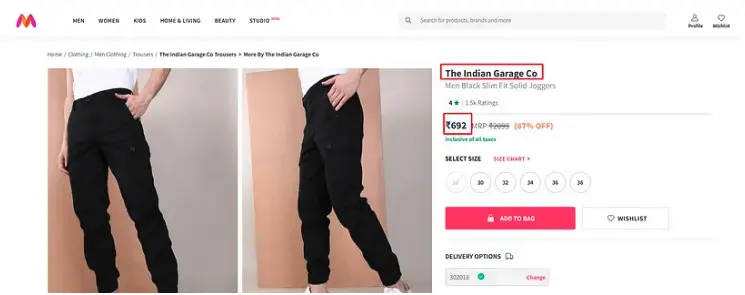
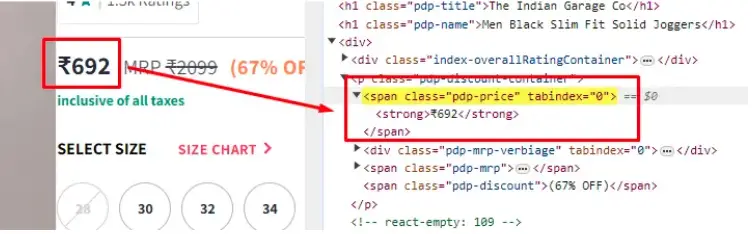
As you can see in the image below, the name of the product is located inside the h1 tag with class pdp-title.
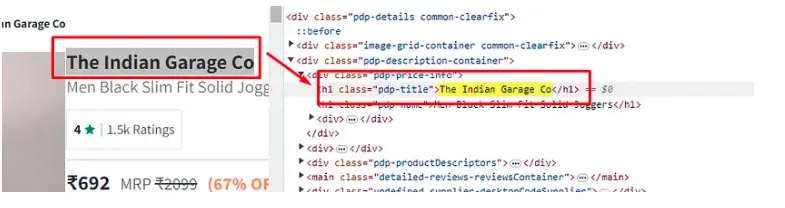
The price of the product is stored inside the span tag with class pdp-price.
Now, we will create the 2_parsing_html.js file for downloading and parsing the data.
// 2_parsing_html.js

const playwright = require('playwright');
const cheerio = require('cheerio')
let obj={}
let arr=[]

async function test(){
 const browser = await playwright.chromium.launch({headless: false});

 const page = await browser.newPage();
 await page.goto('https://www.myntra.com/trousers/the+indian+garage+co/the-indian-garage-co-men-black-slim-fit-solid-joggers/9922235/buy');
 let html = await page.content();

 const $ = cheerio.load(html);
 obj["name"]=$('h1.pdp-title').text()
 obj["price"]=$('span.pdp-price').text()

 arr.push(obj)
 console.log(arr)
 await browser.close();
}

test()
We have added two new lines of code from our 1_open_webpage.js file. content() function will provide us with the raw HTML of our target product page. Then we print that data on our console. With this downloading part is done. We have successfully scraped and downloaded the data from myntra.com. Now, let’s parse the title and price using Cheerio.
Using the load() function we are creating the Cheerio instance.
obj["name"] = $('h1.pdp-title').text();
This line selects the text content inside the <h1> element with the class pdp-title and assigns it to the name property of an object (obj).
obj["price"] = $('span.pdp-price').text();
This line is similar to the previous one but extracts the text content inside a <span> element with the class pdp-price.
Once you run this code, you should get this output.
$ 2_parsing_html.js[ { name: 'The Indian Garage Co', price: '₹692' } ]With this, we have managed to scrape a website using Playwright.
2. How to take Screenshots with Playwright?
Along with scraping you can also take screenshots with Playwright. To take a screenshot, playwright has the built-in screenshot() function that can be applied on the web browser page object.
Taking screenshots at key points in your automation script can help you visually inspect the state of the web page at that moment. This is especially useful when you’re trying to figure out why a certain step is failing.
With just one single line we can take screenshots of any page. For this tutorial, we are going to take a screenshot.
We will create a 3_screenshot.js file with the following code.
// 3_screenshot.js

const playwright = require('playwright');
const cheerio = require('cheerio')
let obj={}
let arr=[]

async function test(){
 const browser = await playwright.chromium.launch({headless: false});
 const page = await browser.newPage();
 await page.goto('https://www.myntra.com/trousers/the+indian+garage+co/the-indian-garage-co-men-black-slim-fit-solid-joggers/9922235/buy');
 await page.screenshot({ path: 'myntra.png' });
 await browser.close();
}
test()
$ node 3_screenshot.jsThe screenshot() function will take a screenshot and save it to your current folder with the name myntra.png. Once you run this code you should get a screenshot like this.
3. How to take a Full-Page Screenshot with Playwright?
To take a full-page screenshot you can pass fullPage argument to the screenshot function. You should get a screenshot like this.
// 4_full_page_screenshot.js

const playwright = require('playwright');
const cheerio = require('cheerio')
let obj={}
let arr=[]

async function test(){
 const browser = await playwright.chromium.launch({headless: false});

 const page = await browser.newPage();
 await page.goto('https://www.myntra.com/trousers/the+indian+garage+co/the-indian-garage-co-men-black-slim-fit-solid-joggers/9922235/buy');
 await page.screenshot({ path: 'fp_myntra.png', fullPage: true });
 await browser.close();
}

test()
$ node 4_full_page_screenshot.js4. How to Scrape Behind an Authentication Wall in Playwright?
Web Scraping is not just about making a GET request to a website, sometimes you will have to bypass the auth wall too. You can perform this task in playwright by using the page.fill and page.click functions. For this example, we are going to scrape the home page of github.com after login.
// 5_authentication.js

const playwright = require('playwright');
const cheerio = require('cheerio')

async function test(){
    const browser = await playwright.chromium.launch({headless: false});

    const page = await browser.newPage();
    await page.goto('https://github.com/login');

    await page.fill('input[name="login"]', "your-user-name");
    await page.fill('input[name="password"]', "your-password");
    await page.click('input[type="submit"]');

    await page.waitForNavigation();
    // scrape anything from here
    await page.screenshot({ path: 'logged_git.png' });
    await browser.close();
   }

   test()
$ node 5_authentication.jsThe .fill method is used to set the value of an input field. It takes two parameters:
selector: A selector that identifies the input field.value: The value to be filled into the input field.
The .click method is used to simulate a click on an element. It takes one parameter:
selector: A selector that identifies the element to be clicked.
Then we are waiting for the navigation to happen using waitForNavigation() function.
Once you are logged in you can scrape any page you like.
Puppeteer vs Playwright
Puppeteer and Playwright both are loved by developers and both libraries have great documentation. Although there are certain differences between the two.
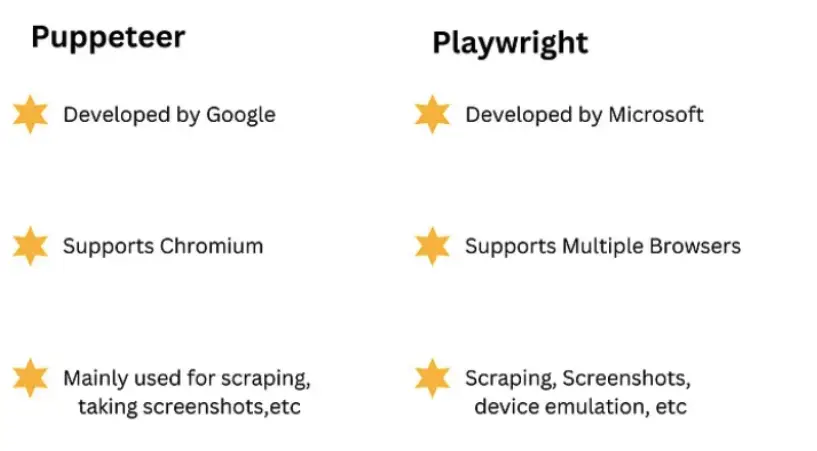
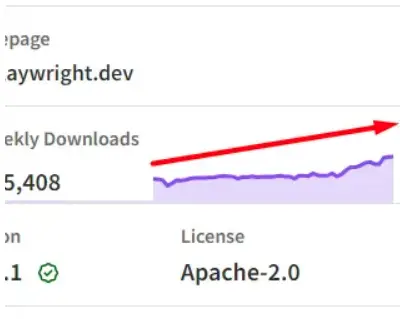
Puppeteer has a large community compared to Playwright but Playwright community is growing very rapidly and you can notice this thing from the graph provided here.
To learn more, follow this great tutorial on how to use Puppeteer in Node.js.
If you need more stats over Puppeteer vs Playwright then do read this. And if you want to understand which will be the better choice for your use case then read this blog to gain more insights.
What’s Next?
Once you know about Playwright, you might want to check out the incredible tutorial by Jose Luis Hernando Sanz about how to use Playwright to extract information from Index Coverage Report in Google Search Console that don’t have an API.
Conclusion
Playwright is a powerful browser automation library that is gaining popularity faster than Puppeteer. It has a strong base that lets you scrape endless websites.
If you like this article then do not forget to share this on your social media pages.

Manthan Koolwal is a web scraping veteran for 8 years, crafted data pipelines for major companies. Founder of Scrapingdog, his SaaS venture, he pioneers simple solutions in the field.