Github is a cloud based Git repository hosting platform.
Github will be of great use when trying to do SEO automation and Machine Learning projects.
You’ll be able to manage versions of your code (e.g. version control) and never lose track of previous versions of your work.
This is also a great place to showcase your work and to do teamwork, but enough with boring facts… let’s dive in.
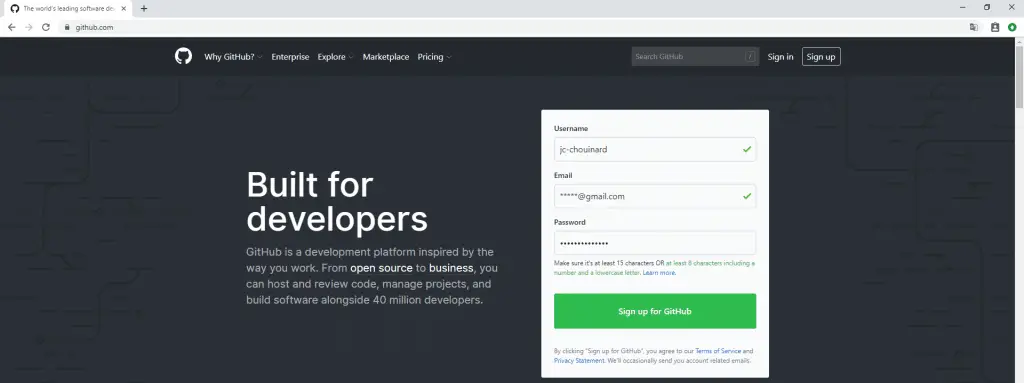
Create an Account on Github
To create an account on Github is fairly straightforward.
Just go to github.com and follow the steps to create an account.
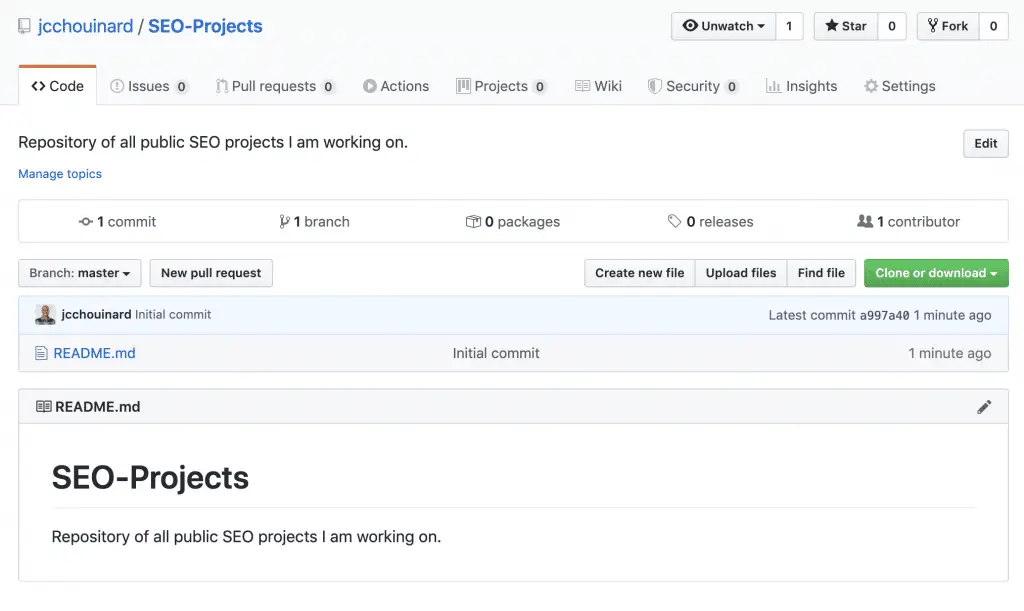
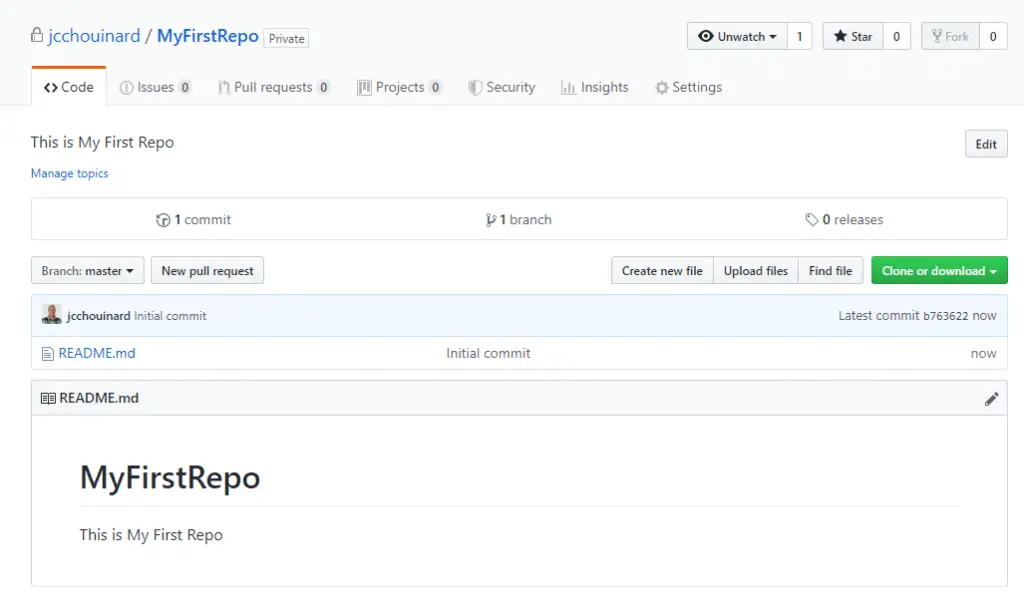
Create a Repository
Create your first repository on Github by following these steps.
- Create a Project: Click on “New repository” in the top right of the page;
- Give your repository a name;
- Initialize this repository with a README;
- Create Your Github Repository: Click on “Create repository”
If you want detailed steps, read this post that tells you how to create a repository on Github.
Install Git on Your Computer
We now need to install Git.
What’s the Difference Between Git and Github?
Git is the tool that will let you create a local repository (on your PC) and manage versions of your files, whereas Github is an online service that will host your Git repositories (in the cloud).
Installing Git is super simple. Just go to the Git Download Folder and follow the steps shown in this video.
At the end of the installation, just click on “launch Git bash”.
You’ll get something like this.
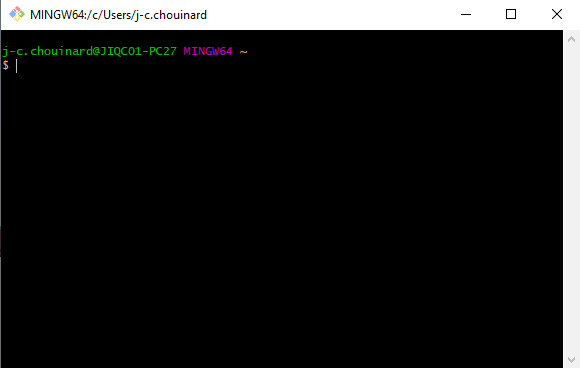
Oh noooooo! Command Line!
Don’t worry, I will make it real simple for you.
Get Started With Git
I promise this will be simple. Just follow carefully these steps to launch Git.
Create a Work Folder
Next, we will create a work folder.
Step #1: Create a Simple Work Folder
All you have to do is to go into the folder that you want to work with and create a new folder as you would do usually.

Step#2: Create a git Folder in Your Local Directory
Go back to git bash.
Input cd and add your folder location.
$ cd '/c/Users/j-c.chouinard/My First Git Project'
Quick Tip: You can drag and drop your folder directly in Git bash instead of manually typing everything.
Run init.
$ git init
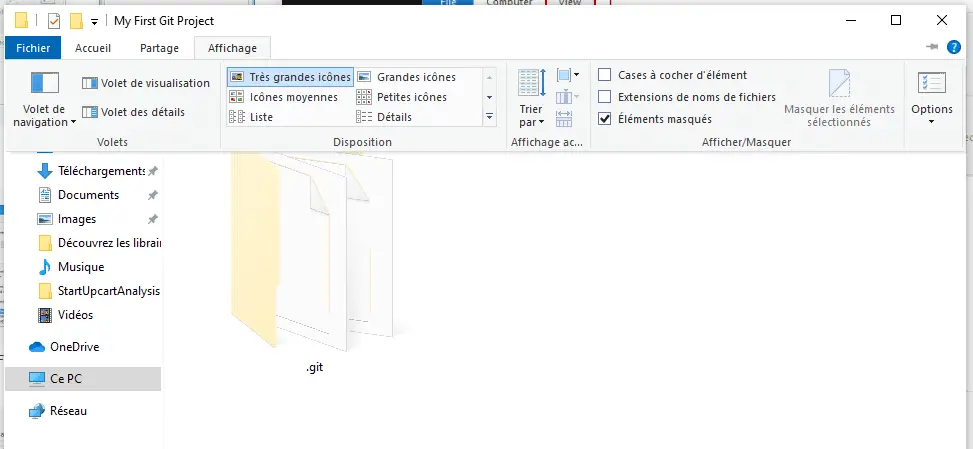
You should end up uith a mention like this:
“Initialized empty Git repository in C:/Users/j-c.chouinard/My First Git Project/.git/”
Nothing seems to have changed, but when you go to “view > Show/hide > hidden items”, you see that a .git file was successfully created.
Step #3: Set-up Your Identity
You will need to set-up an identity.
Your name and email will be used as validations in Git.
First, create a .git folder in your local directory.
Then, add your name and email.
The --global option will let you do this only once.
Step #4: Set-up Parameters
This is all optional, but I suggest that you modify some parameters such as the colors to make it more readable and the default code editor (here I am using Notepad++).
$ git config --global color.diff auto
$ git config --global color.status auto
$ git config --global color.branch auto
$ git config --global core.editor notepad++
Connect Git With Remote Github
We now have created a Github account, created a repository and installed Git locally.
Let’s connect with your open-source cloud repository on Github.
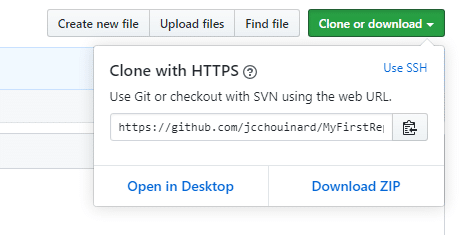
Add a New Remote
Go back to the repository that we’ve created earlier.
Click on “Clone or download” and copy the URL.
Go back to git bash and enter the following line.
$ git remote add GIVENAME https://github.com/username/MyFirstRepo.git
The git remote add command takes two arguments:
- A remote name, “GIVENAME” in our previous example;
- A remote URL, that you copied earlier from your Git repo.
Don’t forget to add your own Github URL and give a short name that will be used to call your repo.
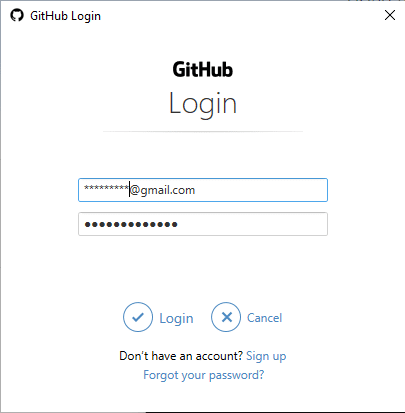
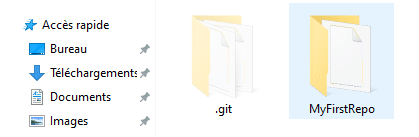
Clone Your Remote Repository to Local Storage
Now that we added a new remote to our directory, let’s clone the repository.
$ git clone https://github.com/jcchouinard/MyFirstRepo.git
A pop-up window should open to ask you to login.
If everything worked properly, you should now have a new directory in your folder with the name of your repository.
Understand Git Branches
You might want to work in your file without commiting your work directly. In which case you would want to use branches.
What Are Branches?
Branches are virtual environments that you can make changes without sending them to Github.
To know which branches are available in your environment, you need to navigate to your newly created repository using cd /your-file-path/MyFirstRep.git in git bash.
Work With Branches
Once in your new folder, you will be able to work with branches.
Here are some basic operations that you can use:
Preview your branches
To preview your branches, use the git branch command:
$ git branch
First, you’ll only get:
$ git branch
* master
This is normal, we haven’t created a work environment yet.
Create a Virtual Work Environment
To create a virtual environment, you will need to use the branch command and add a name.
$ git branch work
Result.
$ git branch
* master
work
Delete a Branch
To delete a branch, use the -d command.
$ git branch -d work
If you have already made modifications to the branch, you will need to force deletion using capital “-D” command.
$ git branch -D work
Move to The Work Environment
To move to the newly-created work environment, use the checkout command with the name of the environment.
$ git checkout work
Result.
$ git branch
master
* work
You can now work safely without committing anything.
Commit Your Work
Let’s say that you have created a test.txt file that you want to commit to Github.
What you need to do is to save a test.txt file into your work folder.
Then, you add the file to your Git Repository using git add.
$ git add test.txt
Then, you commit using the commit -m command.
$ git commit -m "first commit"
Push Your Work To Github
$ git push origin master
Move Commit to Another Branch
You can remove files from a branch without deleting them using git stash.
$ git stash
By using the git stash command, all files to be committed will be removed from the branch and save for later use.
Now, move to the branch that you want using git branch.
$ git branch nameOfYourBranch
Then use git stash apply to add your stashed modifications to your branch.
$ git stash apply
Debugging
View the Current Status of Your Branch
To view what changes have been made to your branch before a commit, use git status.
$ git status
If no changes were made you’ll get this message.
On branch master
Your branch is up to date with 'origin/master'.

nothing to commit, working tree clean
Otherwise, you’ll get something like this:
On branch master
Changes to be committed:
  (use "git reset HEAD <file>..." to unstage)
         modified: yourfile.txt
Check Your Backlog
You can check your historical actions using the git reflog command.
This will show you your latest actions and their SHA, which will be useful to reverse back in case of a wrong commit.
Other Version Control with Git and Github Posts
Learn Git and Github (Complete Guide)
Basics of Version Control
How to Use Git and Github with VSCode

SEO Strategist at Tripadvisor, ex- Seek (Melbourne, Australia). Specialized in technical SEO. Writer in Python, Information Retrieval, SEO and machine learning. Guest author at SearchEngineJournal, SearchEngineLand and OnCrawl.