What are Data Layers? How do they work in Google Tag Manager? How to use data layers?
When you start getting really serious with Google Tag Manager, you get to a point where you know that the real power of Google Tag Manager (GTM) lies within custom variables.
Data layers will help you store information from your website to send to GTM so that you can create advanced variables with the information that is received.
If you know nothing about Google Tag Manager, you might want to start watch that video before.
What are Data Layers?
Data Layers are JavaScript arrays that are used to store and pass information from your website to the Google Tag Manager container.
They can be used to create variables and activate triggers in GTM.

The Supply Chain Analogy
You can get a better understanding of data layers if you view this as a supply chain.
In a supply chain, the manufacturer creates a product and store it in a warehouse to wait for the transporter to come and pick up the product. Then, the product is sent to a store where the end user can buy the product.
In this analogy…
- The manufacturer is your website;
- The product is information (like the price of a product);
- The warehouse is the data layer;
- The transporter is Google Tag Manager;
- The store is Google Analytics (or other app);
- The end user is you reading your Analytics Data;
So, in your online supply chain…
… a website creates a information (like the price of a product,…) and store this information in the data layer to wait for Google Tag Manager to come and pick up the information and store it in macros as objects. Then, the information is sent to a Google Analytics where you can read the information…
…which is the price of a product in this case.
Can’t I Just Access The Information Using Custom JavaScript?
Yes, and no.
You could access the price of a product on your site using custom JS like document.querySelectorAll() for example.
But, if different pages show the price of a product in different ways, using different locations on page, different IDs and different classes, or even if the html changes alltogether, you’ll have a hard time keeping your code up-to-date, with no errors.
Data Layers give you a structured way to store this information.
Instead of looking at the DOM and extract the product price, for each variation of a page, you just extract the product price from the data layer and store it in a variable.
How To Check The Data Layer?
To check the Data Layer, open the Chrome Devtools JavaScript console using Ctrl+Shift+I > Console.
Enter the command dataLayer.
You’ll see the objects in the dataLayer. that were already pushed by Google Tag Manager when it was initiated.
The gtm.js is the event sent when GTM loads, the gtm.dom is the event sent when the page is loaded and the gtm.load send an event when Google Tag Manager has fired all the events that have been deployed using GTM.
How to Send Information in the Data Layer?
You can send information in the dataLayer using dataLayer.push().
- The
dataLayer.push()can be written directly into the page template from the server. The Google Tag Manager for WordPress plugin can help you do the job in WordPress. - The
dataLayer.push()can be generated dynamically by your web server using a combination of JavaScript and HTTP requests.
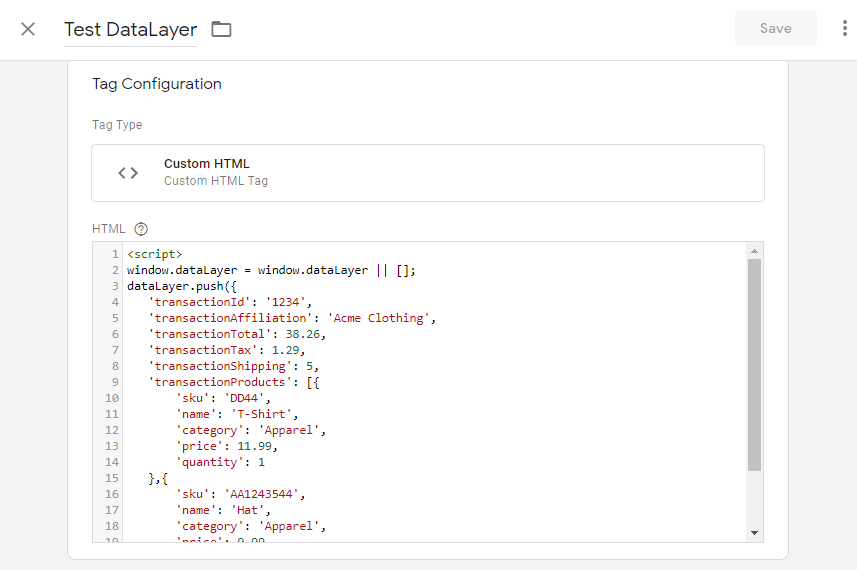
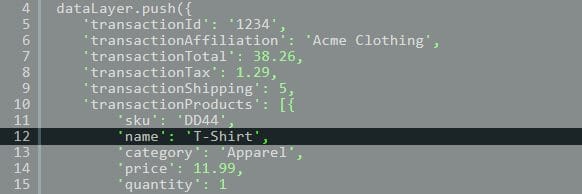
Here is an example of how the data layer code can be implemented in JavaScript for ECommerce platforms.
<script>
//Coming from Google's official documentation
window.dataLayer = window.dataLayer || [];
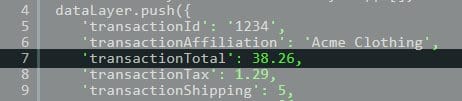
dataLayer.push({
'transactionId': '1234',
'transactionAffiliation': 'Acme Clothing',
'transactionTotal': 38.26,
'transactionTax': 1.29,
'transactionShipping': 5,
'transactionProducts': [{
'sku': 'DD44',
'name': 'T-Shirt',
'category': 'Apparel',
'price': 11.99,
'quantity': 1
},{
'sku': 'AA1243544',
'name': 'Hat',
'category': 'Apparel',
'price': 9.99,
'quantity': 2
}]
});
</script>
You could also push the data Layer using custom HTML in Google Tag Manager, but this is not recommended and defeats the purpose of Data Layers.
Verify If Your Data Layer Configuration is OK
You can verify if your Data Layer configuration is pushed to the page by using the GTM built-in preview tool.
Go to the top-right end of your Google Tag Manager UI and click “Preview”.
A box telling you “Now Previewing Workspace – Default Workspace” will appear.

Go to your website and reload the page.
At the bottom of your page you should now have the preview tool UI.
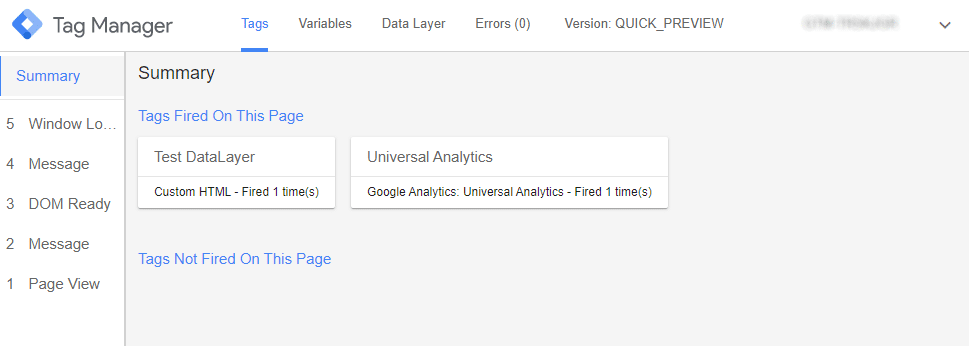
Go to Data Layer, and you should see the value of the Data Layer that you pushed.
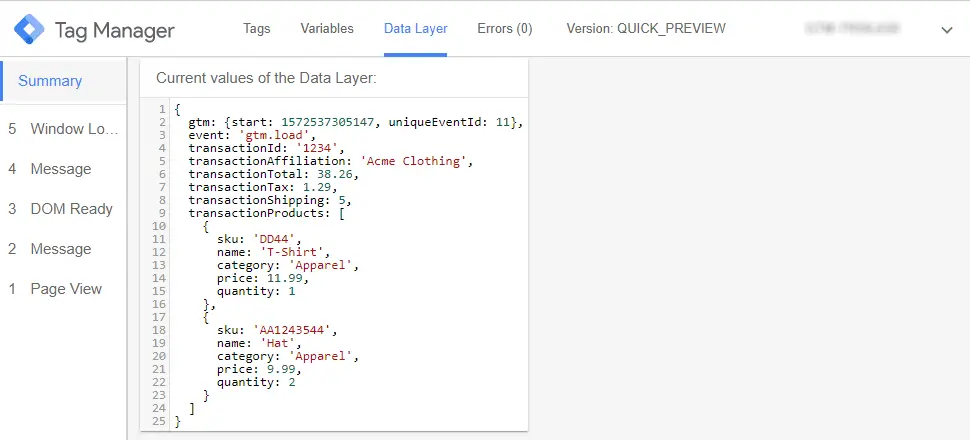
Easiest Way to Create a Data Layer Variable
Let’s say that you’ve implemented the code shared above in your data layer and you’d like to tore the value of the transaction in a variable.
1. Create a variable
To create a Data Layer variable, you need to go in GTM > variables > User-Defined Variables and click “New”.
I will call my variable dlv - transactionTotal
2. Configure the Data Variable
Now it is time to configure the data variable.
Select Data Layer Variable as a variable type.
In the Data Layer Variable Name field, add the variable key. In this case, the key is transactionTotal.
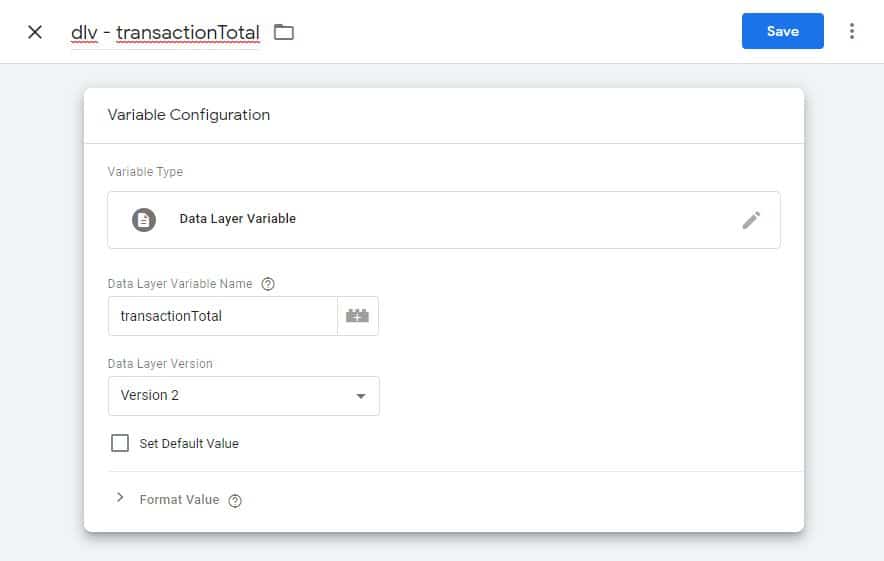
Click “Save”.
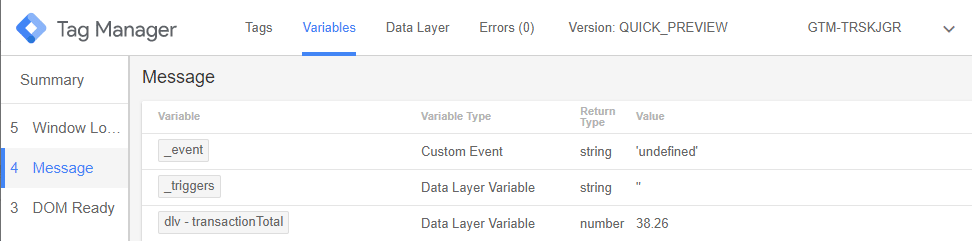
If you go back the the Preview tool, you will see that under “variables”, in the “Page View”, the Data Layer is still “undefined”, but in the “Message” the Data Layer shows 38.26 as a value.
You might want to store a nested object like it is the case with the product name “T-Shirt” that is nested under “transactionProducts”.
In this case, you can’t just use “name” as your key.
You will need to use the dot (.) notation to access the T-Shirt value like this: transactionProducts.name.
However, I purposely made an error in this last example. transactionProducts is actually an array. Since there are multiple products that are stored in transactionProducts, you will need to add the position of the product that you want to select.
In JS, the first object of an array has the index “0”. So, to select the first product, you’ll need to select the product with index 0, like this:
transactionProducts.0.name
This is it. You are now ready to use data Layer variables in Google Tag Manager.

SEO Strategist at Tripadvisor, ex- Seek (Melbourne, Australia). Specialized in technical SEO. Writer in Python, Information Retrieval, SEO and machine learning. Guest author at SearchEngineJournal, SearchEngineLand and OnCrawl.