This easy tutorial will show you the steps to install Google Optimize with Google Tag Manager.
(even if you are an absolute beginner)
What we are going to do is:
- Create a Google Optimize Account
- Link Your Google Analytics Account To Google Optimize
- Install Google Optimize With Google Tag Manager
Create a Google Optimize Account
Let’s start by creating a Google Optimize account.
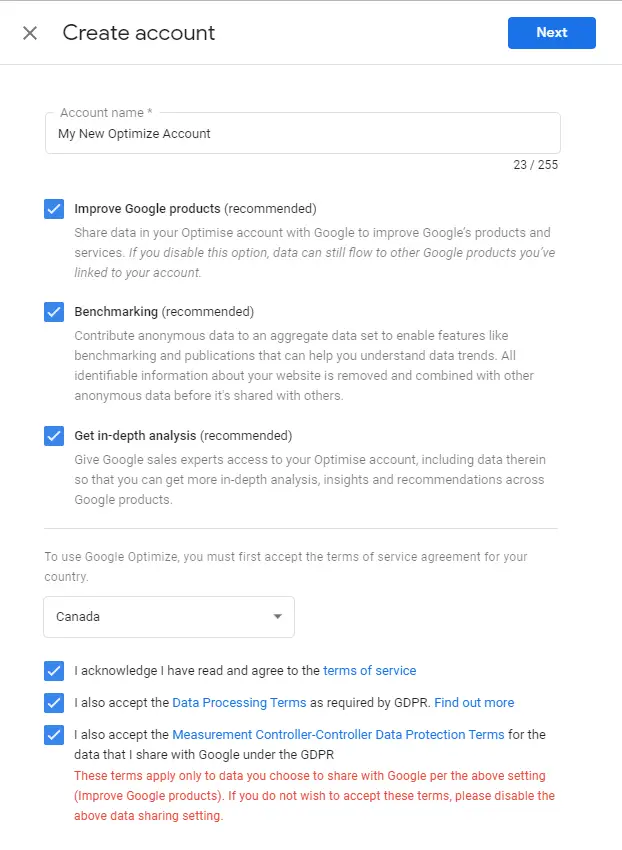
Log in to Google Optimize and click on “Create Account”

Name your account.
Here I would suggest that one business have an account. If you have multiple businesses that don’t overlap, create one account for each.
If your business operates in Europe, you should agree to GDPR terms.
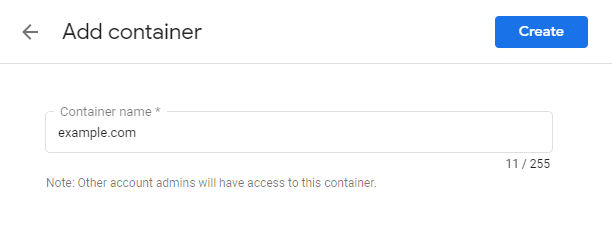
Create your container.
Rule of thumb: I usually create one container per website.
Link Your Google Analytics Account to Google Optimize
We will now skip a step and go straight to linking your Google Analytics account to Google Optimize.
Why?
Because no test can run if you don’t have access to a Google Analytics account.
If you can’t complete this step: stop!
Then, either you ask your developers for the proper Google Analytics access or you create a new Google Analytics account.
Let’s go on!
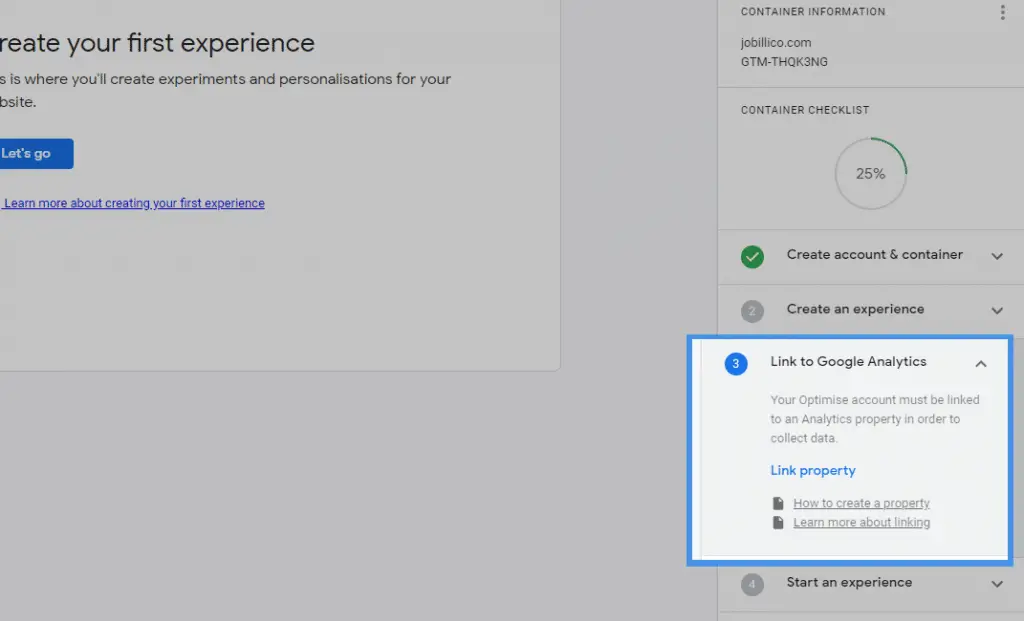
Click on “Link to Google Analytics”.
Click on “Link property” and select a property.
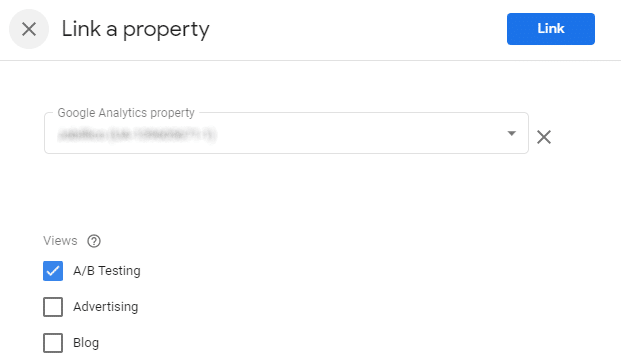
I would suggest that you create a view specific to A/B testing. This way the tests don’t impact your main Google Analytics data.
Click on “link”.
Install Google Optimize Using GTM
It is now time to install Google Optimize using Google Tag Manager (GTM).
You need the following information to install Optimize:
- Your Analytics tracking ID.
- Your Optimize container ID.
- Have Google Analytics installed via Google Tag Manager
The tracking ID is the string that looks like this UA-XXXXXXXXX-1. It can be found in Google Analytics > Admin > Property > Property Settings > Tracking ID.
The container ID is the string that looks like this “GTM-A1B2CD”. It can be found in Google Optimize > All Accounts > Accounts page > Container ID.
Here are the steps that we are going to follow to install Google Optimize via Tag Manager:
- Step 1: Install Google Analytics via GTM
- Step 2: Copy the Google Optimize Installation Snippet
- Step 3: Create a Google Optimize Tag
- Step 4: Trigger Google Optimize From the Universal Analytics Tag
- Step 5: Preview Your Tag Implementation
- Step 6: Publish Your GTM Container
Step 1: Install Google Analytics via GTM
Before you can keep going on.
Since Google Optimize uses Google Analytics data to give you results from your A/B testing experiments, you’ll need to connect Google Optimize to Google Analytics.
And since we are launching optimize with GTM, we also need to install Google Analytics (GA) via Google Tag Manager (GTM).
If you have already done it, great!
If not.
See how you can install Google Analytics via Google Tag Manager.
Step 2: Copy the Google Optimize Installation Snippet
The optimization Snippet, or OPT_CONTAINER_ID, is the snippet that looks like this GTM-A1B2C3. You need to copy it and save it somewhere as we will need it soon.

Step 3: Create a Google Optimize Tag
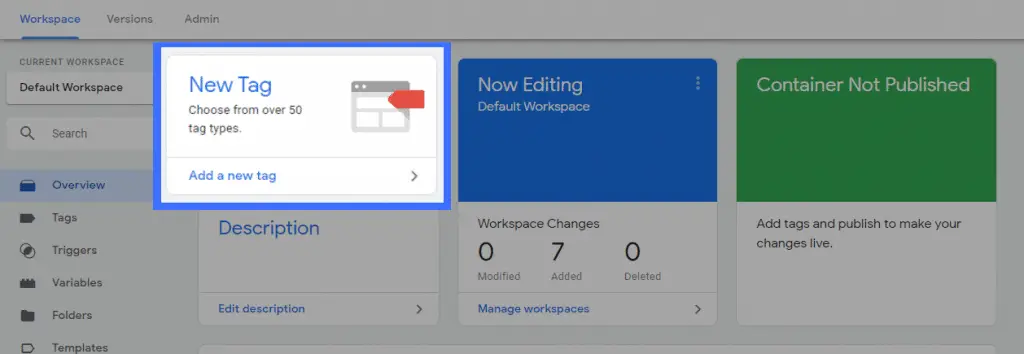
Sign in to Google Tag Manager.
Click on “New Tag”
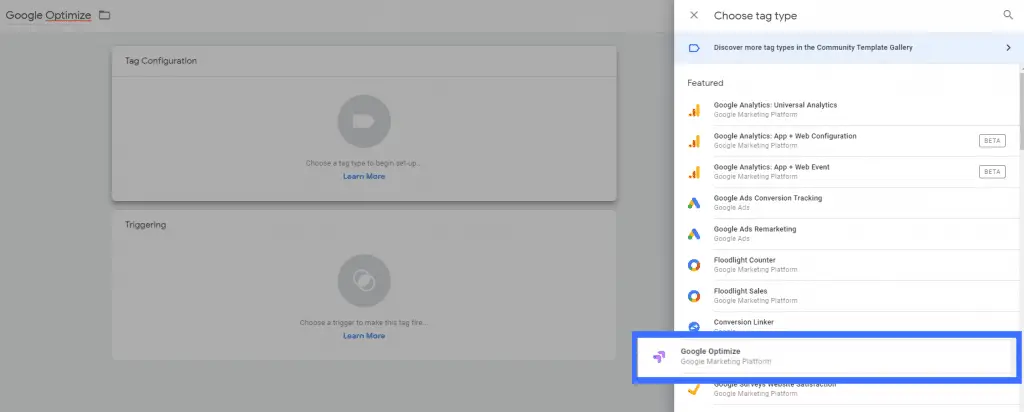
Click Tag Configuration > Google Optimize
Add the container ID that you copied earlier (e.g. GTM-XXXXX).
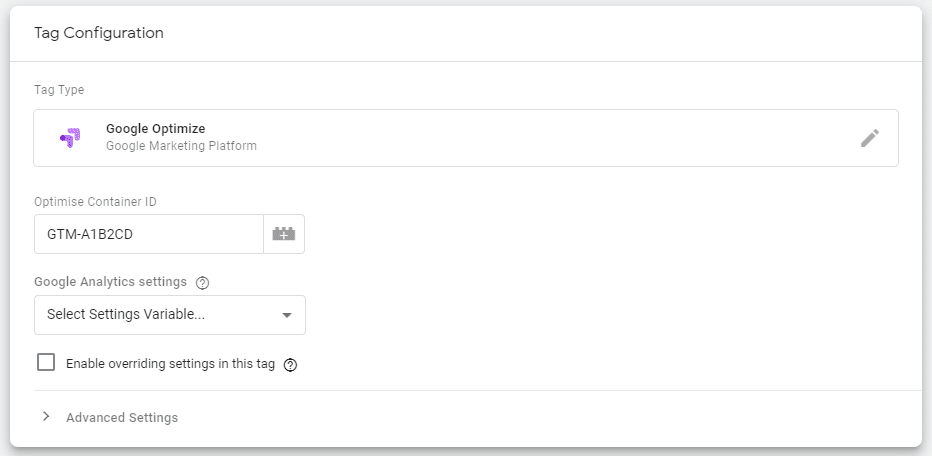
At this point, if you have installed Google Analytics with Google Tag Manager in the past, you should have your Google Analytics Tracking code variable set up.
Select it in the Google Analytics settings.
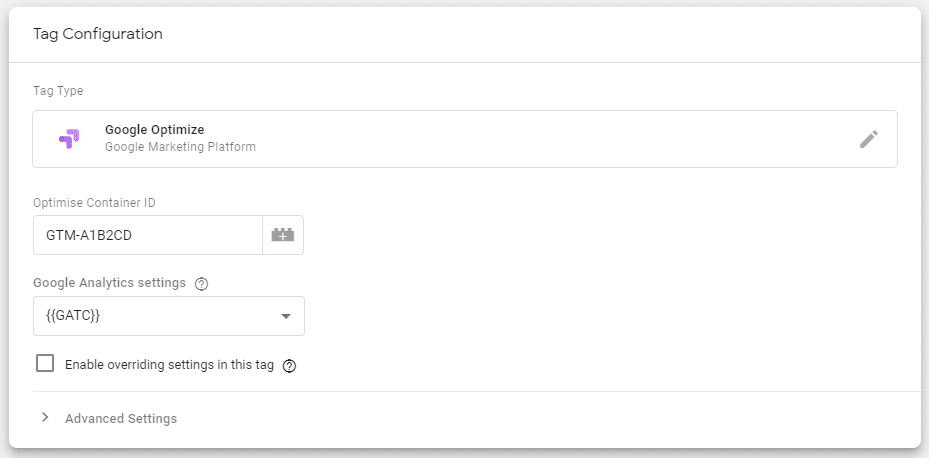
If not, click on “Select Settings Variable” > New Variable and add your Tracking ID (UA-XXXXXXXXX-1) that you can find in Google Analytics > Admin > Property > Property Settings > Tracking ID.
Click “Save”.
Save the Tag without triggers.
Step 4: Trigger Google Optimize From the Universal Analytics Tag
Open the Google Analytics pageview tag for the Analytics property linked to your Optimize container.
Click on Tag Configuration > Advanced Settings > Tag Sequencing.
Check the box to fire a tag before Google Analytics fires.
You want to fire the Google Optimize Tag before Google Analytics because Google Analytics need Optimize to run before they can track the result of your tests.
Typically, it means that Google Analytics relies on the output of Google Optimize.
This box basically makes a JavaScript Callback fonction.
Use your newly created Google Optimize Tag as a Set-up Tag.
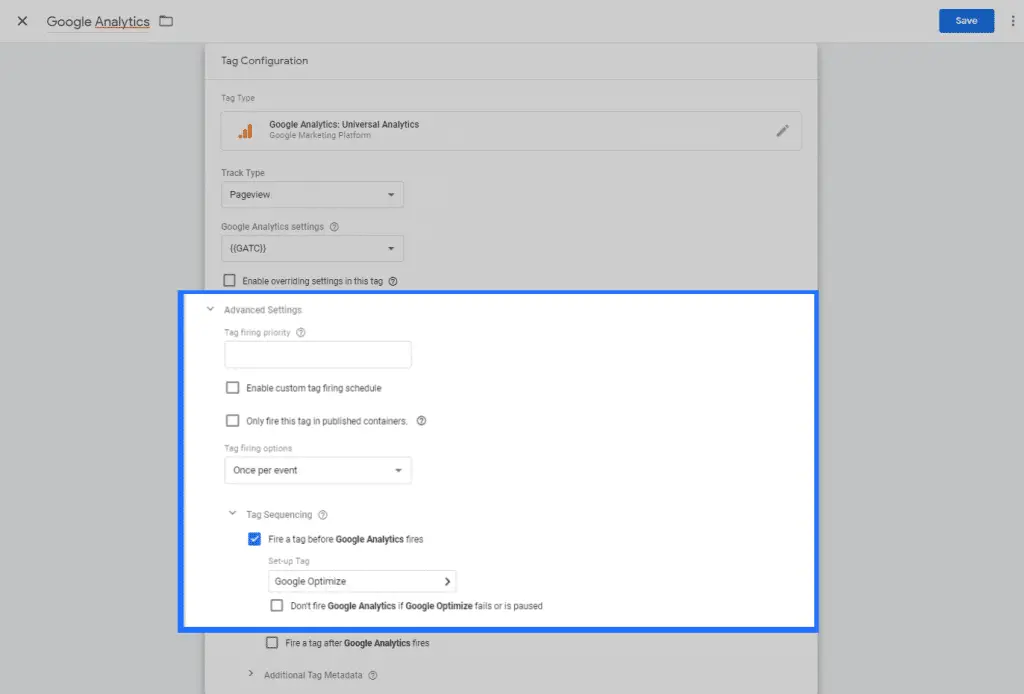
The trigger should stay the same so it can fire once on every pageview.
Save the Tag.
Step 5: Preview Your Tag Implementation
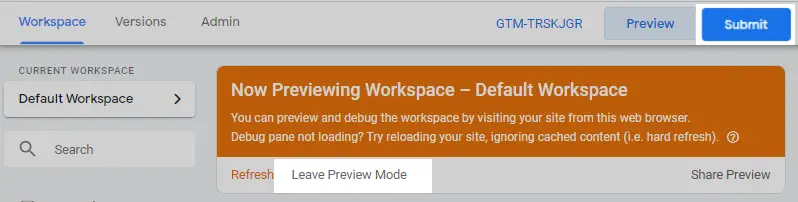
Now it is time to preview if the tag fires properly.
Click on Preview.

You should have the mention “Now previewing workspace”.

Go to your website.
Since your tag is firing on “All pages”, a box should open at the bottom of any web pages on your website.
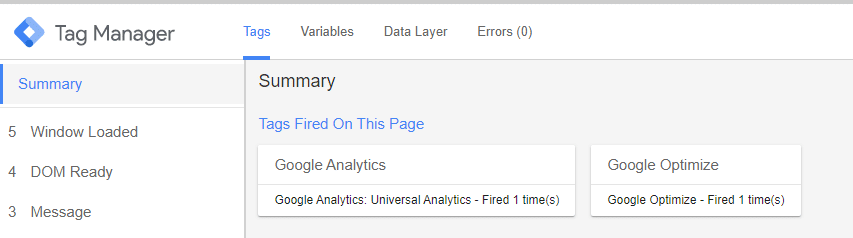
If your Google Optimize Tag is shown under “Tags Fired on This Page”.
Your tag was properly implemented.
Step 6: Publish Your GTM Container
You can now “leave preview mode” and press “submit” to publish your container.
Congratulations, you have now Installed Google Optimize using Google Tag Manager (GTM).

SEO Strategist at Tripadvisor, ex- Seek (Melbourne, Australia). Specialized in technical SEO. Writer in Python, Information Retrieval, SEO and machine learning. Guest author at SearchEngineJournal, SearchEngineLand and OnCrawl.