In this post, I will show you how to implement SEO split-testing experiments using Google Tag Manager (GTM).
Precisely, I will show you how to implement Dynamic Meta Title and Meta Description that you can set-up to all of your test pages.
This is the third part of our guide on how to setup your own SEO split tests with Python, R, the CausalImpact package and Google Tag Manager.
Step 1: Install Python and R Using Anaconda
Step 2: Stratified Sampling Using Google Analytics + Python
Step 3: SEO Split-Testing Experiments using Google Tag Manager
Step 4: CausalImpact for SEO [Complete DIY SEO Experiment]
(Optional) Learn python for SEO
Is It Possible to Get Meta Data Indexed By Google?
Disclaimer: I believe Google Tag Manager as a means to do SEO Split Testing is unreliable.
Let’s understand why.
As Eoghan Henn has shown, it is possible to implement post DOM SEO changes using Tag Manager. It is not something that I would suggest that you implement to stay like that, but it is a great workaround to implement SEO tests on your own.
Even Google says that you can do it.

However, when I look at this post from Simo Ahava, it looks like it is only possible for the pages with little JavaScript to render.
[…] I was told that sometimes Google’s crawlers decide not to render the JavaScript version. The justification was that pages with heavy JavaScript would create an enormous load for Google’s crawlers to work with, which is why they might not render the JavaScript at all in favour of sparing resources.
Simo Ahava
What does it mean?
It means that…
…for pages with heavy JavaScript, this solution will probably fail…
…for pages with less JavaScript, this solution might actually work.
What you need to do is to make sure that your tag fire before the DOM screenshot is loaded. (Learn More about JavaScript for SEO)
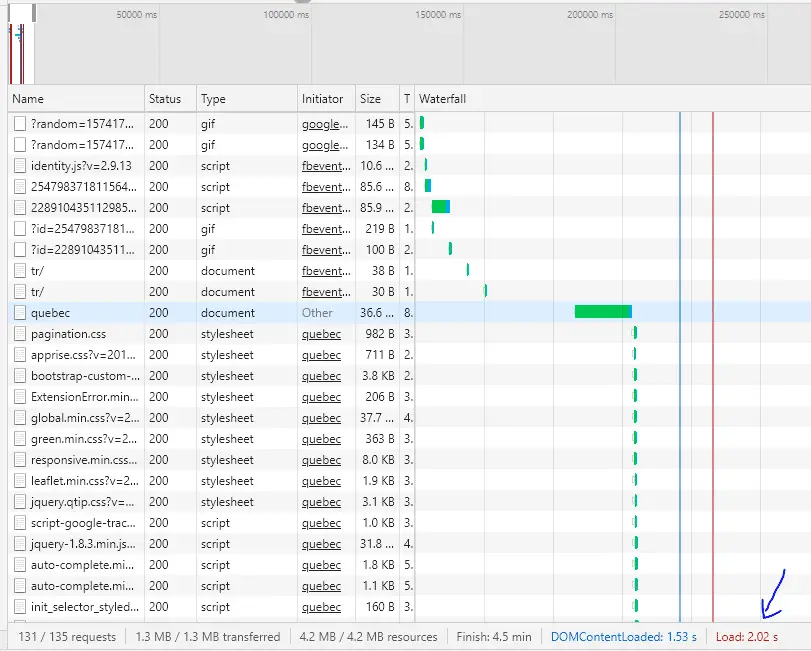
It took me 4 days after the URL was first declared indexed by Google Search Console to get the first successful meta title change out of 5 URLs.
However, it kept jumping from one title to the other for a while. This is due to the fact that the website I tested had a lot of JavaScript.
After 8 days, 4 out of 5 were indexed. I thought it was fantastic, and then, it kept moving up and down from one title tag to the other.
So, being so volatile, changing Title tags with Tag Manager is not a reliable solution.
There is one good news though. The Meta Description got indexed easily and was stable after a few days only.
Knowing this, let’s try to set-up our own SEO experiment anyway.
Set-Up Static Meta Titles Using Tag Manager
This is the easy part.
What we are going to do is this.
Find a page. Create a variable. Modify the tag using jQuery.
Step 1: Create a Lookup Table
Go in GTM > variables > User-Defined Variables > New
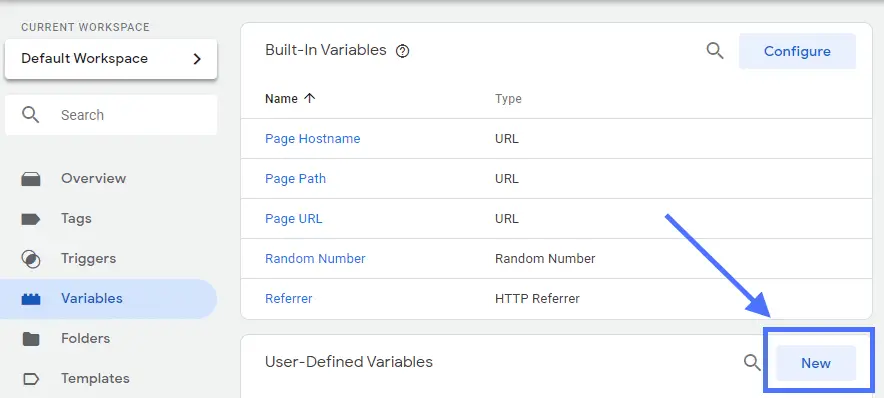
Then, create a “Lookup Table” variable that will go over each URLs that you want to change the Tag.
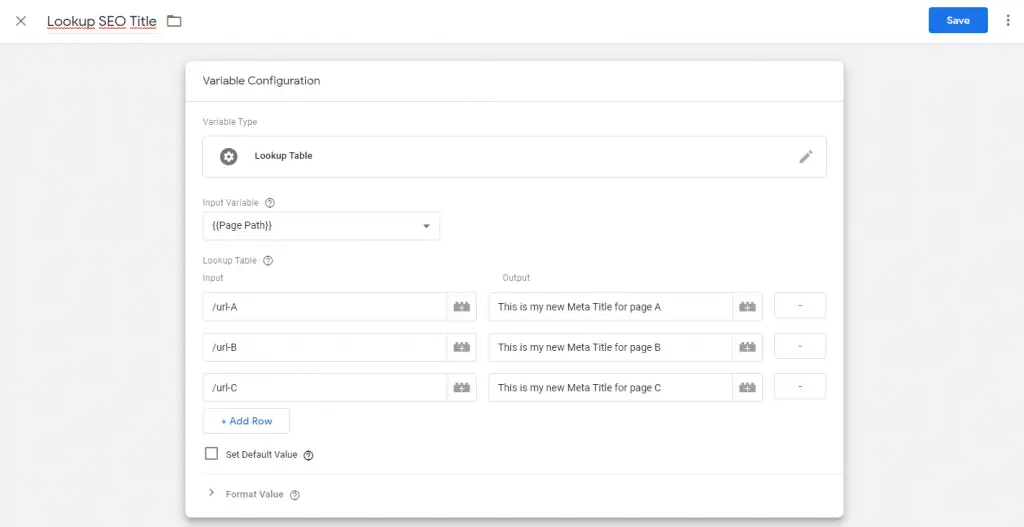
Step 2: Set-up Your Tag
Once your lookup table is done, move to the Tags folder and click on “New”.
You will need to create a custom HTML tag and insert this bit of code.
<script>
    document.title = {{Lookup SEO Title}}
</script>
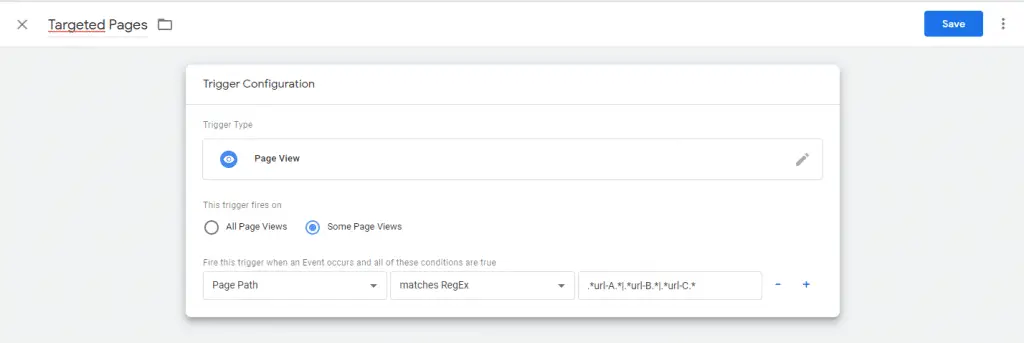
Step 3: Create Your Trigger
Finally, create a trigger that will fire on PageViews for the URLs that you targeted earlier.
Step 4: Preview Your Code and Submit
Preview your code to see if the meta Title appears on your page.

When you press F12 on your keyboard in preview mode, you should see in your code that the title tag was updated, which is what you want.
<!DOCTYPE html>
<html>
<head>
<!-- some code -->

<title>Your New Meta Title</title>

<!-- some code -->
</head>
But wait.
The old title tag is still there.
What do I mean?
If instead of clicking F12 you click on CTRL + U, you’ll view the source code.
By searching for your <title> tag, you’ll notice that it will look like this instead:
<!DOCTYPE html>
<html>
<head>
<!-- some code -->

<title>Your Old Meta Title</title>

<!-- some code -->
</head>
This is because your meta title was modified post-DOM.
This is why you don’t want to leave it like this forever.
This solution only adds up a level to your code. At some point, you want to modify your tags server-side.
You are ready to hit “Submit”.
Set-Up Dynamic Meta Titles Using GTM
Why setting-up dynamic meta tags is important?
In fact, most websites will have a lot of pages.
In this case, I have job postings in multiple cities.
It is more interesting to add dynamic titles and description that uses the city and the name of the job posting than to manually write down everything.
In this test, I will show you how I could use the number of job postings and the name of the city to implement an SEO Split Test.

My goal was to set-up a meta title that looked like that.
New job postings in {city} on Jobillico
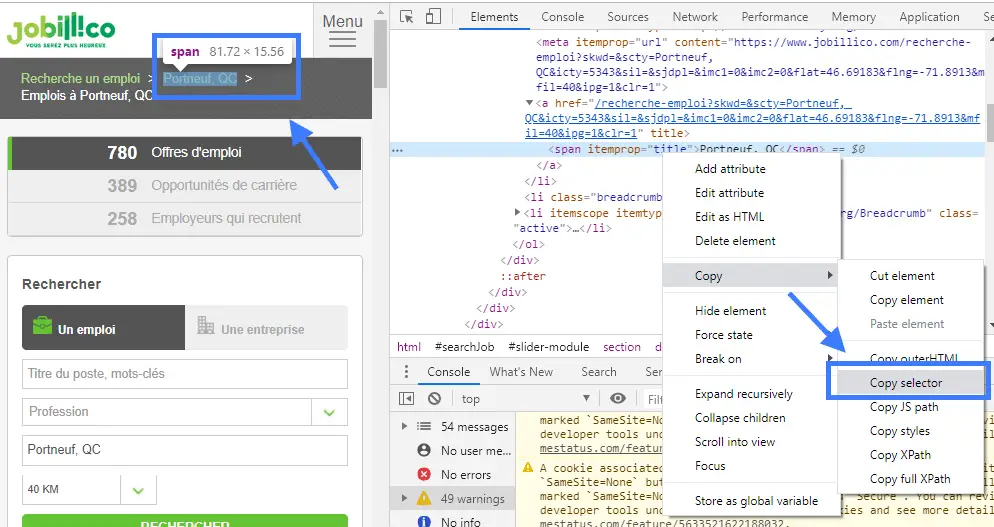
Step 1: Find the Element That You Want to Extract
The first step is to extract the data that you want to set as your dynamic variable.
In my case, I want to extract the name of the city.
First, go to your website and right-click the element that you want to extract and click “inspect”.
Then, right click on the HTML element > Copy > Copy Selector
Step 2: Create an Extractor Variable
Then, go back to GTM and click on variables > User-Defined Variables > New.
Then, create a “DOM Element” variable and add the copied CSS selector from above.
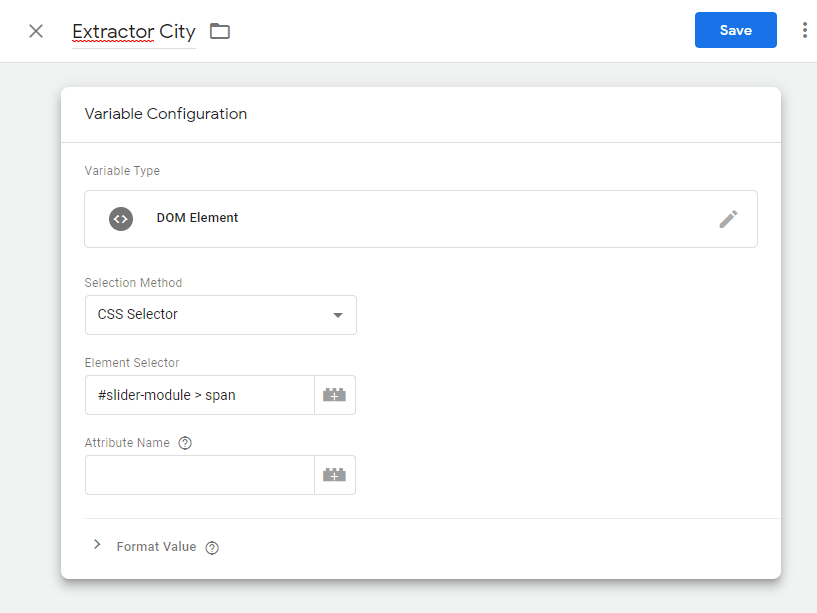
Click “Save” and you now have your new variable.
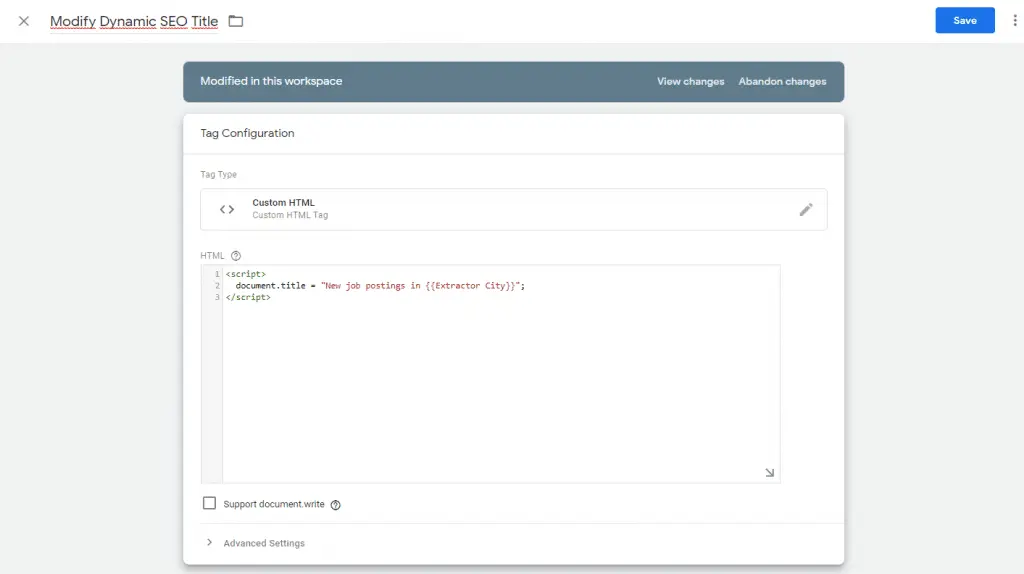
Step 3: Create Your Tag
Go in Tag > New and create a “Custom HTML” tag.
Add this code to dynamically modify the <title> tag.
<script>
  document.title = "New job postings in {{Extractor City}}";
</script>
Here insert your {{Extractor City}} variable created earlier.
Step 4: Create Your Trigger
As in the last example, you will create a trigger that’ll fire on PageViews for the URLs that you want to target.
Step 4: Preview Your Code and Submit
Finally, preview your code and submit.
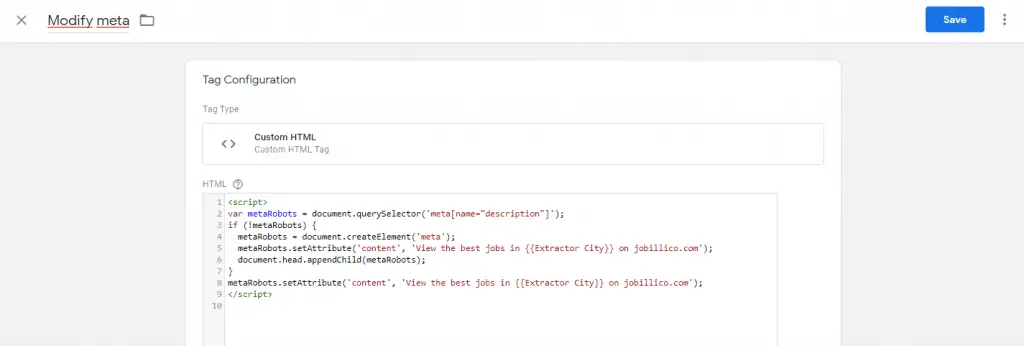
Set-Up Dynamic Meta Descriptions Using GTM
Now, you can use the dynamic extractor variable that you create to modify your meta description tag.
<script>
var metaRobots = document.querySelector('meta[name="description"]');
if (!metaRobots) {
  metaRobots = document.createElement('meta');
  metaRobots.setAttribute('content', 'View the best jobs in {{Extractor City}} on jobillico.com');
  document.head.appendChild(metaRobots);
}
metaRobots.setAttribute('content', 'View the best jobs in {{Extractor City}} on jobillico.com');
</script>
Let’s Wrap-Up: The E-Commerce Case Study
To wrap up, let’s see a concrete example.
Let’s say we have a product category page with many attributes and would like to test a new title and meta description.
Take Amazon.

You want to create a dynamic title and description for yellow men’s shirts under 25$.

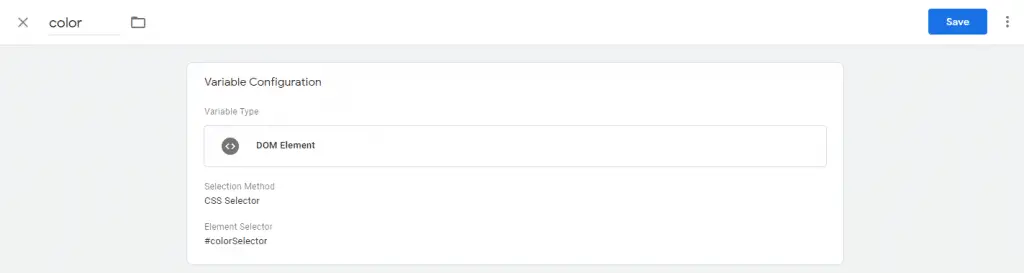
What you would do is to copy the CSS selector for each of the Dynamic Elements: the price, the color, the product type, and the end-user.

Then, you would create a DOM Element variable for color, then one for gender’s, then one for product type, then one for the price.
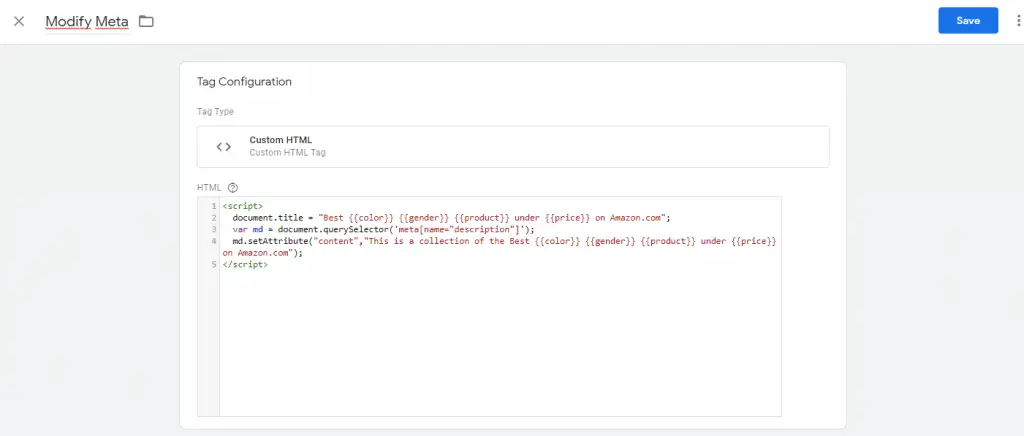
Then, you would create a Custom HTML Tag that would include each of those custom variables.
<script>
  document.title = "Best {{color}} {{gender}} {{product}} under {{price}}";
  var md = document.querySelector('meta[name="description"]');
  md.setAttribute("content","This is a collection of the Best {{color}} {{gender}} {{product}} under {{price}}");
</script>
At last, you would trigger this on the pages that you would want to target.
Then, your result would look like this and would generate dynamically depending on the page that you are.


You could go even further.
Let’s say that you want to get the number of products to add to your description.

What you don’t want is to show 0 results, but you also don’t want to show more than a thousand products.
You could create a custom JavaScript Variable instead of a DOM element variable.
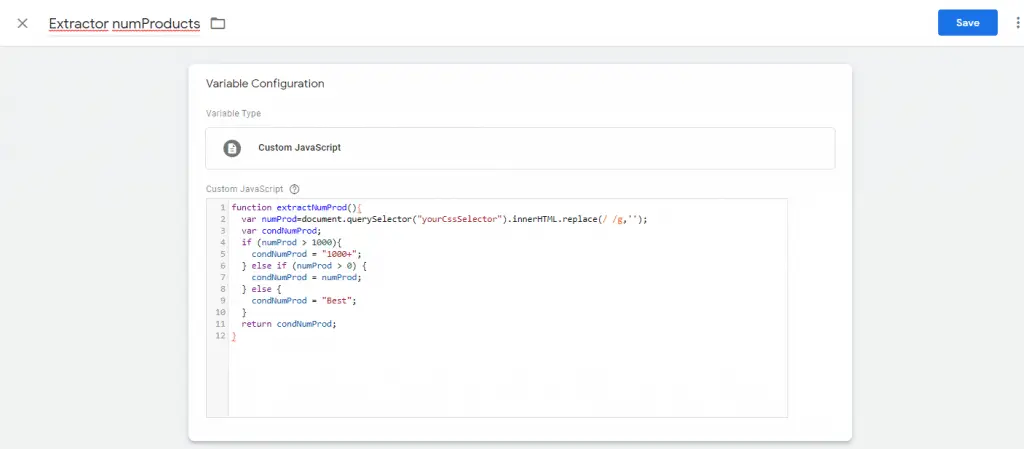
function extractNumProd(){
  var numProd=document.querySelector("yourCssSelector").innerHTML.replace(/ /g,'');
  var condNumProd;
  if (numProd > 1000){
    condNumProd = "1000+";
  } else if (numProd > 0) {
    condNumProd = numProd;
  } else {
    condNumProd = "Best";
  }
  return condNumProd;
}
Then, you’d get a tag that adds the number of products dynamically
<script>
  document.title = "{{Extractor numProducts}} {{color}} {{gender}} {{product}} under {{price}}";
  var md = document.querySelector('meta[name="description"]');
  md.setAttribute("content","Buy from{{Extractor numProducts}} {{color}} {{gender}} {{product}} under {{price}} on Amazon.com");
</script>
If the number of products is between 0 and 1000.

If the number of products is over 1000.

If you have 0 products. (You might want to noindex, but that is another case)

This is the end of this tutorial on SEO Split Testing of meta tags with Google Tag Manager. Make sure that you learn from the full tutorial on SEO Split Testing.

SEO Strategist at Tripadvisor, ex- Seek (Melbourne, Australia). Specialized in technical SEO. Writer in Python, Information Retrieval, SEO and machine learning. Guest author at SearchEngineJournal, SearchEngineLand and OnCrawl.