Creating a test group and a control group using Google Analytics and Python is the first step towards SEO Split Testing.
In this guide we will learn how to Extract Google Analytics Data With Python following those steps:
- Create your credentials in Google Developer Console;
- Connect to Google Analytics with Python;
- Extract Results;
- Assign pages randomly to test groups using stratified sampling.
The result will be a test group of a few URLs selected randomly.
This is the second part of our guide on how to setup your own SEO split tests with Python, R, the CausalImpact package and Google Tag Manager.
Step 1: Install Python and R Using Anaconda
Step 2: Stratified Sampling Using Google Analytics + Python
Step 3: SEO Split-Testing Experiments using Google Tag Manager
Step 4: CausalImpact for SEO [Complete DIY SEO Experiment]
(Optional) Learn python for SEO
Let’s begin!
Extract Google Analytics Data With Python
The first step to make an SEO Split Test is to create a test group of pages that you’ll compare with a control group.
The control group will be used as a predictor to compare whether or not the fluctuation in your test group is what you should have expected or not. To understand a little more about the science behind SEO Title Tags split tests, just read how Etsy has done it in the past.
To run this Python code, you can do it with either Jupyter Notebook or Spyder IDE at your preference.
Create Your Credentials in Google Developer Console
It is easier than it looks to create your credentials in the Google Developer Console.
I have a super simple guide to “connect to the Google Analytics API“, but here are the simplified steps.
- Sign-in to Google’s developer’s console
- Create a Project in Google API
- Activate the Google Analytics Reporting API
- On the “credentials” page click “create credentials” and select “Service account key“.
- Create a JSON key and download it to your computer.
- Log in to Google Analytics
- In the Admin, select the view that you want to extract data from and go to User Management.
- Open the service account JSON key file that you just downloaded in a text editor.
- Copy the client_email and give this email read permissions.
Connect to Google Analytics with Python
Now, it is time to connect to Google Analytics with Python.
Once you have downloaded your clients_secrets file from the Google Developer Console, rename your JSON key to client_secrets.json and save it to your working folder.
Also, make sure that you change the values of regexInc and regexExc for the path that you want to test.
Example, if you want to test all your /products/ pages except for the “shoes” subfolder /products/shoes/, you would use these regular expressions.
regexInc='.*\/products\/.*'
regexExc='.*\/shoes\/.*'
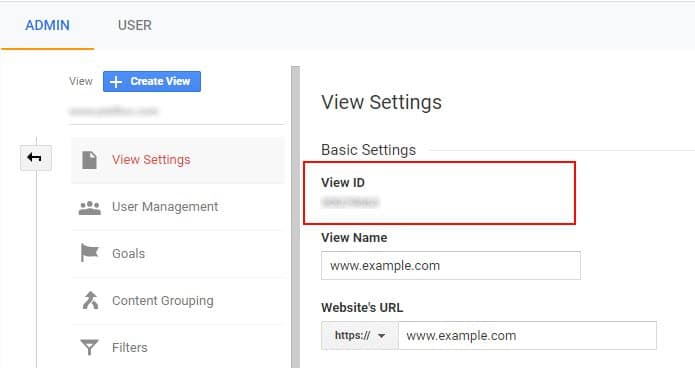
You also need to change the ViewID from your own Google Analytics Account.
To get your view ID, go to Google Analytics > View > View Settings > View ID.
Below, we are going to use Pandas, httplib2 and oauth2client to extract Google Analytics data.
Note that oauth2client is deprecated. For an alternative solution, check out this Google Colab by JR Oakes.
"""
Step1: Load Libraries
"""

from oauth2client.service_account import ServiceAccountCredentials
from apiclient.discovery import build
import httplib2
import pandas as pd

"""
Step 2 : Connect to Google Analytics
"""

apis.com/auth/analytics.readonly'])

#Create a service object
http = credentials.authorize(httplib2.Http())
service = build('analytics', 'v4', http=http, discoveryServiceUrl=('https://analyticsreporting.googleapis.com/$discovery/rest'))


regexInc='.*\/your-folder-page-path-regex\/.*' #If you want to target you product pages you could use '.*\/products\/.*'
regexExc='.*\/sub-folder-you-dont-want\/.*' #If you want to target product pages but not in category shoes '.*\/shoes\/.*'

response = service.reports().batchGet(
    body={
        'reportRequests': [
            {
                'viewId': 'XXXXXXXXX', #Google Analytics > View > View Settings > View ID.
                'dateRanges': [{'startDate': '90daysAgo', 'endDate': 'today'}],
                'metrics': [{'expression': 'ga:sessions'}],
                'dimensions': [{"name": "ga:landingPagePath"}],
                "filtersExpression":f"ga:landingPagePath=~{regexInc};ga:landingPagePath!~{regexExc};ga:sourceMedium==google / organic", # "=~" contains regex, "!~" does not contain regex, ";" is an AND operator, use "," as OR operator if you want.
                'orderBys': [{"fieldName": "ga:sessions", "sortOrder": "DESCENDING"}],
                'pageSize': 1000 #Target top 1000 pages
            }]
    }
).execute()
Export Results to a DataFrame
Create two empty lists that will hold our dimensions and session data and extract data.
dim = []
val = []

#Extract Data
for report in response.get('reports', []):

    columnHeader = report.get('columnHeader', {})
    dimensionHeaders = columnHeader.get('dimensions', [])
    metricHeaders = columnHeader.get('metricHeader', {}).get('metricHeaderEntries', [])
    rows = report.get('data', {}).get('rows', [])

    for row in rows:

        dimensions = row.get('dimensions', [])
        dateRangeValues = row.get('metrics', [])

        for header, dimension in zip(dimensionHeaders, dimensions):
            dim.append(dimension)

        for i, values in enumerate(dateRangeValues):
            for metricHeader, value in zip(metricHeaders, values.get('values')):
                val.append(int(value))


#Sort values by number of sessions.
val.reverse()
dim.reverse()

df = pd.DataFrame()
df["Sessions"]=val
df["URL"]=dim
df=df[["URL","Sessions"]]
df
#df.to_csv("page_by_sessions.csv")
Create Random Stratified Sampling
Here we want to randomly select pages so they are representative of the overall group of pages with a similar number of organic sessions. We will use the Scikit Learn train_test_split module to do so. Here is how it works.
If you have a large number of pages, you could also use Numpy’s
randintto create a sample before your create your train and test strata.
# Create a sample with 5000 pages only from 100000 pages.
sample = np.random.randint(100000, size=5000)
sampled_data = data[sample]
Add Labels to URLs Attributing Them to Stratas Depending on Sessions
Here it really depends on the amount of traffic you have, how you want to select your data. This is just an example that you could run.
df["label"] = df["Sessions"].apply(lambda x:"Less than 50" if x<=50 else ("Less than 100" if x<=100 else ("Less than 500" if x<=500 else ("Less than 1000" if x<=1000 else ("Less than 5000" if x<=5000 else "Greater than 5000")))))
selectedPages = df[df["label"]!="Greater than 5000"] # Remove high value pages to mitigate risk
selectedPages["label"].value_counts() #View number of values per group
Create your Test and Control Groups
from sklearn.model_selection import train_test_split
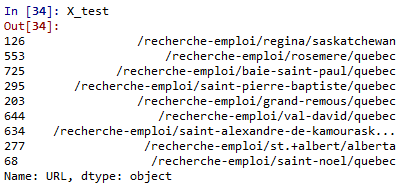
X_train, X_test, y_train, y_test = train_test_split(selectedPages["URL"],selectedPages["label"], test_size=0.01, stratify=selectedPages["label"]) #1% is not much but perfect for our case
y_test.value_counts()
#X_test.to_excel("test_group.xlsx") #Export to excel if you want.
You can now extract your test group URLs using X_test and your control group URLs using X_train.

SEO Strategist at Tripadvisor, ex- Seek (Melbourne, Australia). Specialized in technical SEO. Writer in Python, Information Retrieval, SEO and machine learning. Guest author at SearchEngineJournal, SearchEngineLand and OnCrawl.