In this step-by-step tutorial, you are going to learn how to make the most basic Django Application with Python.
Requirements for this Tutorial
- Know how to use Python: Read the complete guide on Python for SEO.
- Have Python installed: Install Python With Anaconda
- Have a code editor installed: I use Visual Studio Code
What is Django?
Django is a Python framework that lets you build web applications. It is a bit more complex to use than Flask but has a built-in admin interface.
Steps to Create a Django App (Condensed)
Creating a Django application starts with the optional step of creating a virtual environment.
$ conda create -n first_django_project python=3.8
$ conda activate first_django_project
Then follow the steps to create the Django App.
- Install Django:
$ pip install Djangoor$ conda install -c anaconda django - Create a project in Django:
$ django-admin startproject <PROJECT_NAME> - Create a Django App:
$ cd <PROJECT_NAME>then$ python manage.py startapp <APP_NAME> - Add app to settings.py:
<PROJECT_NAME>/<PROJECT_NAME>/settings.py - Add URL to the APP in the project:
<PROJECT_NAME>/<PROJECT_NAME>/urls.py - Create the APP
urls.pyfile:$ cd django_appthen$ touch urls.py - Add a path to the Index in the URL patterns in
<app_name>/urls.py. - Create the Index Route in
<app_name>/views.py - Create the index.html template:
$ mkdir -p templates/<APP_NAME>,$ touch templates/<APP_NAME>/index.html, then add the HTML to the file. - Make the migrations:
$ cd ..then$ python manage.py migrate - Run the Django server:
$ python manage.py runserverthen open the browser to the local server IP.
Getting Started With Django
The code for this tutorial is available on Github. This tutorial will show you how I built this repository. If you don’t know how to use Github, I recommend that you read my complete guide on Git and Github.
You can
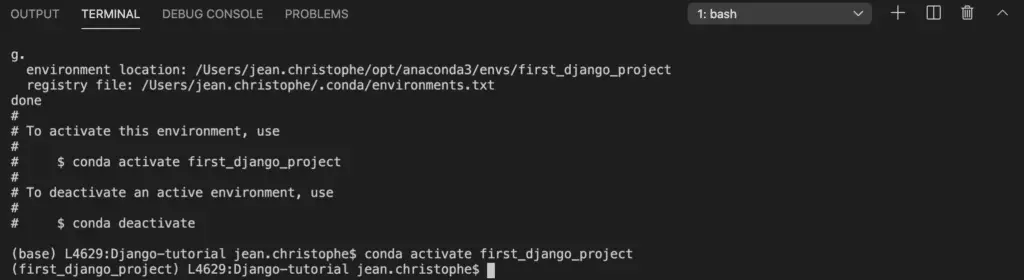
Optional: Create a Virtual Environment
If you want to make sure that there are no conflict, create a virtual environment.
In Terminal, type:
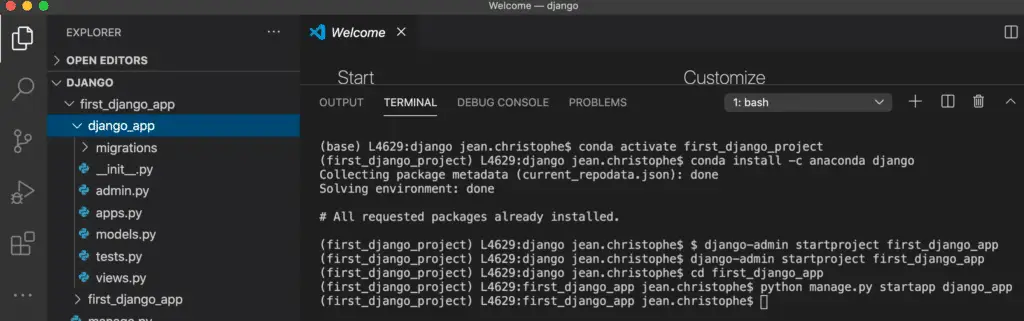
$ conda create -n first_django_project python=3.8
$ conda activate first_django_project
Starting Django From Scratch
Start by creating a folder where you will work.
Then, open your code editor inside that folder.
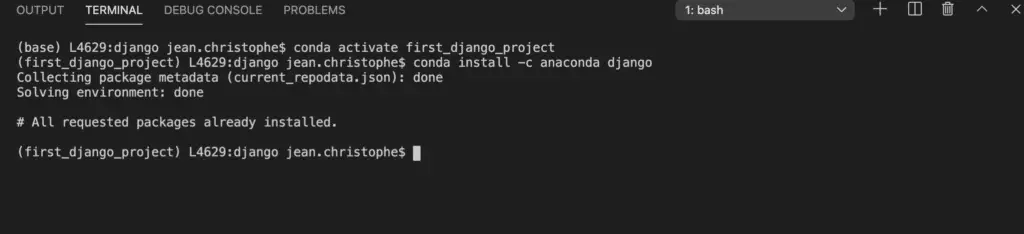
Step 1. Install Packages
Now it is time to install the Django library.
Open the Terminal.

$ pip install Django
or
$ conda install -c anaconda django
Step 2. Create a Django Project
Create a Django project using $ django-admin startproject <PROJECT_NAME>.
$ django-admin startproject first_django_app
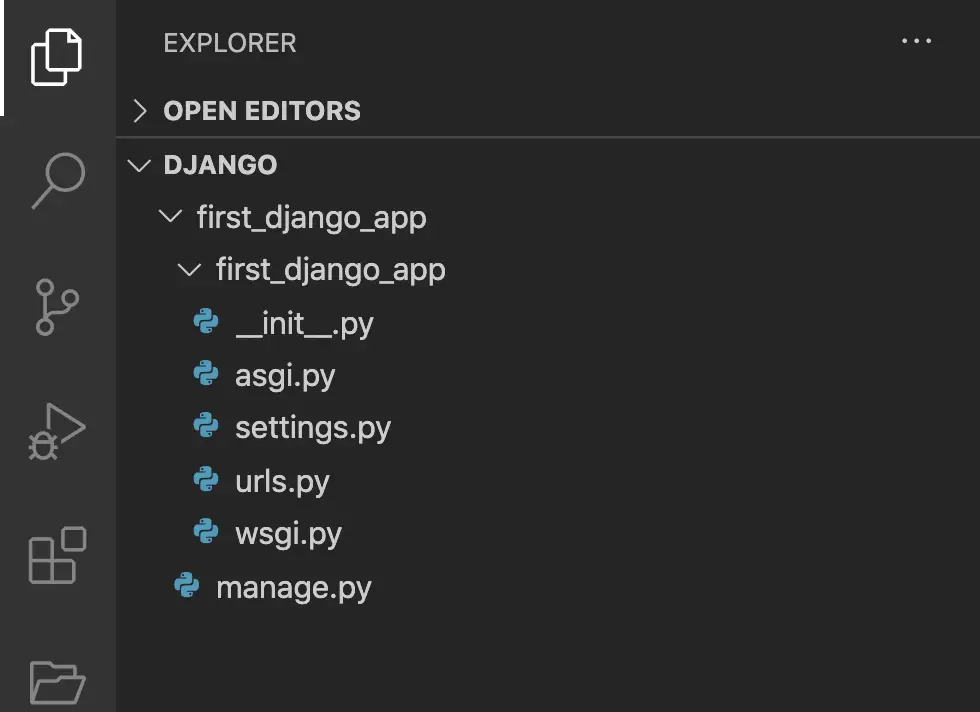
This operation created the first_django_app project.
Step 3. Create a Django App
A project can have multiple applications. Let’s create our first application.
Move Into the Project Folder using $ cd <PROJECT_NAME>.
$ cd first_django_app
To create the app, we are going to use the manage.py file configurations in this format $ python manage.py startapp <APP_NAME>.
$ python manage.py startapp django_app
This operation created the django_app folder inside the first_django_app directory.
Step 4. Add Your App to Settings.py
In your app settings.py file.
first_django_app > first_django_app > settings.py
Go to the INSTALLED_APPS
Add your <APP_NAME> to the list.
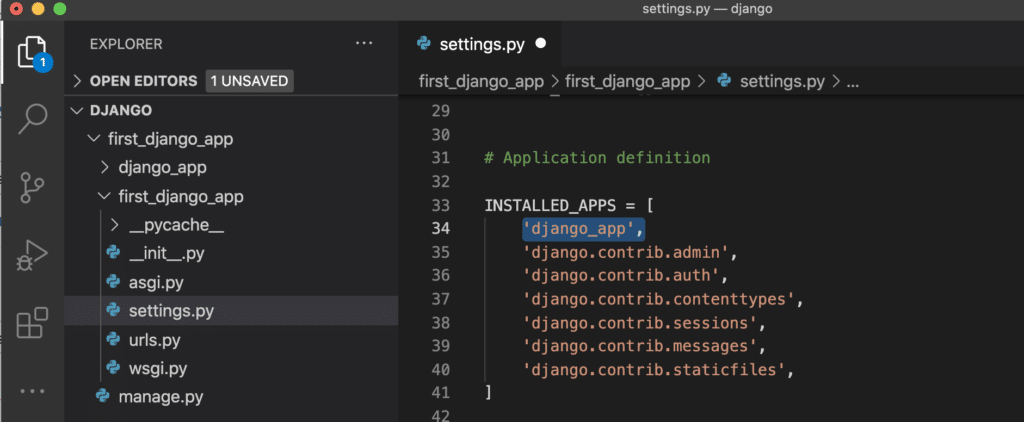
Save the file.
Step 5. Add the URL to the APP inside the project
Now, we will add a url to the application inside the project.
In the urls.py file.
first_django_app > first_django_app > urls.py
Import the include module.
from django.urls import include, path
Add path('', include('<APP_NAME>.urls')) to the list of URL patterns.
from django.contrib import admin
from django.urls import include, path

urlpatterns = [
    path('admin/', admin.site.urls),
    path('', include('django_app.urls'))
]
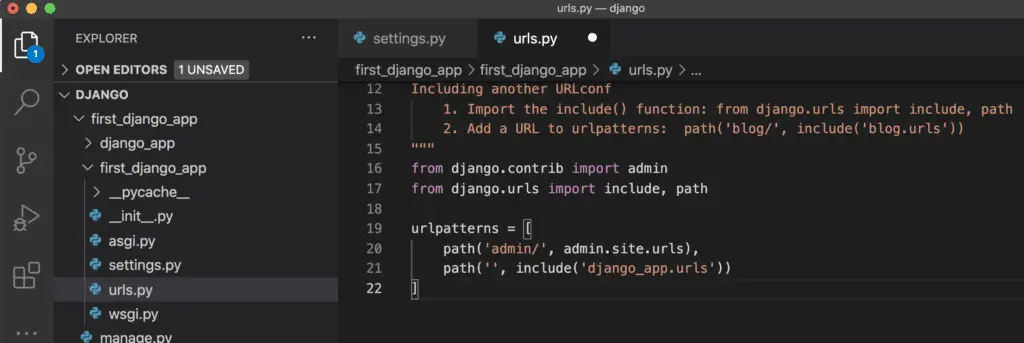
Save the file.
Step 6. Create the APP Urls.py File
Now, we will create a file with urls specific to the application.
Move into the app using $ cd <APP_NAME>.
$ cd django_app
Create the app urls.py file.
$ touch urls.py
A new urls.py file is created.
first_django_app > django_app > urls.py
Step 7. Add a Path to the Index in the URL Patterns
Now we will modify the app urls.py file to add the path to the index.
Open the urls.py file.
first_django_app > django_app > urls.py
$ code urls.py
Add this to the urls.py file.
from django.urls import path

from . import views

urlpatterns = [
    path("", views.index, name="index")
]
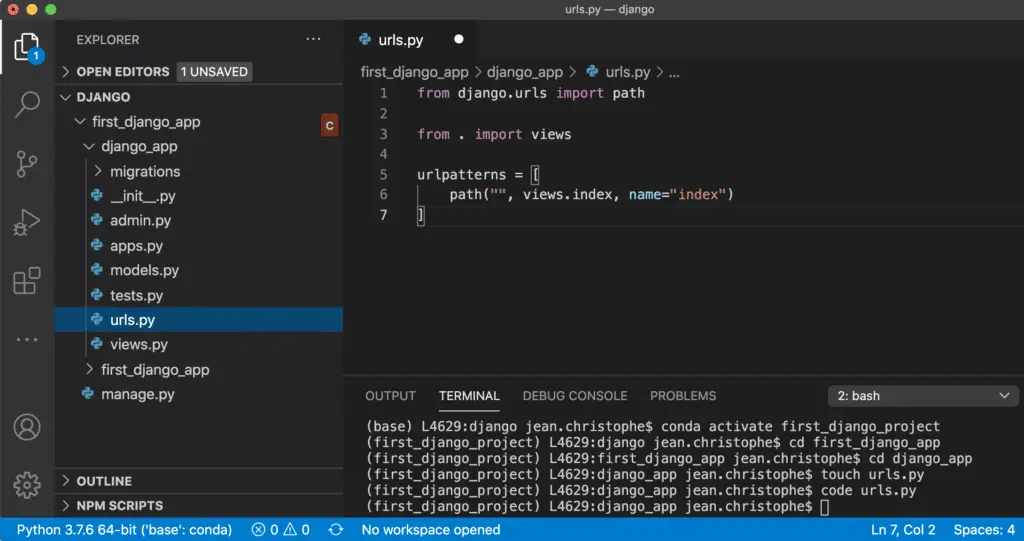
Save the file.
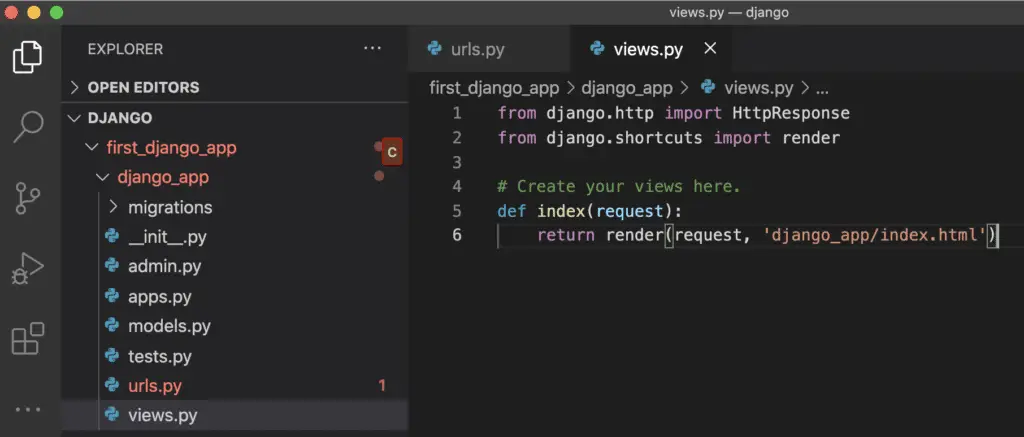
Step 8. Create the Index Route in views.py
We need to create the index route inside the views.py file.
Open the views.py file.
first_django_app > django_app > views.py
The index route needs to render the index.html template that we will create later. To do so, use the render module.
from django.http import HttpResponse
from django.shortcuts import render

# Create your views here.
def index(request):
    return render(request, 'django_app/index.html')
Step 9. Create the Index.html Template
Now, we need a HTML template for the home page.
But first, we need to create the directory to store the template.
$ mkdir -p templates/django_app
Then, create the index.html file inside that directory.
$ touch templates/django_app/index.html
first_django_app > django_app > templates > django_app > index.html
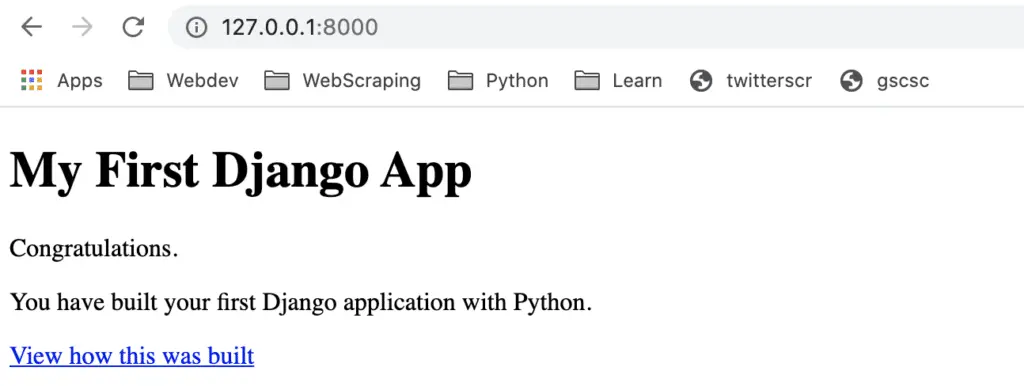
Last, we need to add HTML content to the template.
Open the HTML file either manually or from terminal.
$ code templates/django_app/index.html
Add the HTML.
<!DOCTYPE html>
<html>
    <head lang="en">
        <meta charset="utf-8">
        <meta http-equiv="X-UA-Compatible" content="IE=edge">
        <title>My First Django App</title>
        <meta name="viewport" content="width=device-width, initial-scale=1">
    </head>
    <body>
        <h1>My First Django App</h1>
        <p>Congratulations.</p>
        <p>You have built your first Django application with Python.</p>
        <a href="https://www.jcchouinard.com/get-started-with-django/">View how this was built</a>
    </body>
</html>
Save the file.
Step 10. Make the Migrations
Now it is time to commit your work to Django. This process is called a migration.
To make the migration, come back to the project directory.
$ cd ..
We will use the manage.py configurations to migrate.
$ python manage.py migrate

Step 11. Run the Django Server
Everything should be done. All you need to do is run the Django server locally.
To do so, run:
$ python manage.py runserver
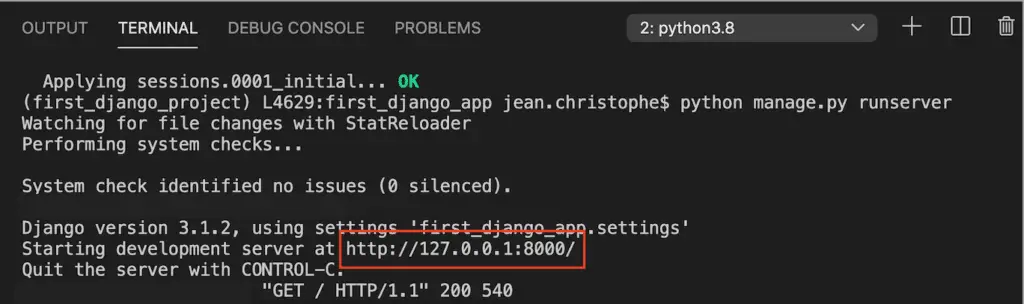
Open your browser to the IP address above.

If you have carefully followed all the steps, you should get the desired result. If you encountered some problems, just follow through with the cloned repository.
Closing the Project
Quit the server using CTRL + C.
Deactivate your conda environment.
$ conda deactivate
Starting From Cloned Repository
In your Terminal type (without the $ sign):
$ git clone https://github.com/jcchouinard/Django-tutorial.git
Move to the folder location.
$ cd path/to/cloned-repository
Install Packages
To install all the required packages and making sure there are no conflict, you can install requirements.txt.
You can use pip if you haven’t created the virtual environment.
$ pip install -r requirements.txt
or use conda if you did.
$ conda install --file requirements.txt
Run the Django Server
Move into the project directory.
$ cd first_django_app
Run the Python Server.
$ python manage.py runserver
Open your browser to the IP address above.
Conclusion
This is it for this step-by-step python introduction tutorial to Django. If you have successfully built your Django Application, congratulations. Make sure that you share on social media if you enjoyed it and let me know on twitter via @ChouinardJC.

SEO Strategist at Tripadvisor, ex- Seek (Melbourne, Australia). Specialized in technical SEO. Writer in Python, Information Retrieval, SEO and machine learning. Guest author at SearchEngineJournal, SearchEngineLand and OnCrawl.